
Herbalist
Herbalist
Kami McBride is a well-known author and educator whose bestselling book, “The Herbal Kitchen,” has helped thousands of people learn how to use common kitchen herbs and spices in delightfully simple, new, and delicious ways. She developed and taught the herbal curriculum for the Complementary Medicine Department at the University of California School of Nursing, and she founded the Living Awareness Institute in 1994 where she offers online herbalism courses to students of all skill levels.
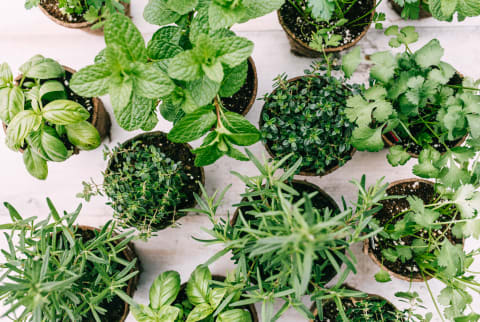
Image by Melanie DeFazio / Stocksy
June 5, 2023
Our editors have independently chosen the products listed on this page. If you purchase something mentioned in this article, we may
If you’ve ever attempted to dry your own herbs, the process may have gone something like this:
Advertisement
This ad is displayed using third party content and we do not control its accessibility features.
- Feel like a botanical goddess as you spend the day gathering, drying, and storing your herbs.
- Return to the jar a month later to find mold or perfectly crispy but flavorless herbs.
- Wonder if you’ll be doing that again!
Drying herbs is simple in theory, but doing it successfully is an art. If you dream of buying seasonal herbs at the farmers market—or learning to grow or forage your own—and drying them for nutrient-rich flavor year-round, read on.
Factors that will impact how herbs dry
Your environmental climate:
It sounds obvious, but herbs will dry faster in an arid climate than in a cold, moist one. Simple things like this can trip us up if we’ve heard information from a source living in another region, so it’s something to be cognizant of as you plan your approach. For example, if you heard someone based in a different place say, “Let this herb dry for three days,” well, you really can’t be certain this is how long it will take in your environment.
Not only is the drying process climate-specific, but the time of day and even the time of year can also affect moisture levels. Herbs tend to have more moisture in the morning than evening and in the spring than in late fall.
Advertisement
This ad is displayed using third party content and we do not control its accessibility features.
Your household climate:
Same idea but even more specific to you. A drafty farmhouse will likely be more susceptible to swings in temperature and humidity than an airtight apartment building. If a heater or fan is blowing, that will have a drying effect. Think about whether your house is hot, cold, dry, damp, or humid.
The type of herb:
Is it a dry or wet herb? Sage, for example, is a very dry herb, while chives contain a lot of moisture. Dry herbs like sage and thyme have a shorter drying time than moist herbs like chives or mint.
Summary
Every herb is different, and every situation is different. Before drying your herbs, consider these three factors and you’re much more likely to find success.
Advertisement
This ad is displayed using third party content and we do not control its accessibility features.
The best drying methods
Now that you’ve answered the three questions above, it’s time to decide which herb-drying method you’ll want to use:
Method 1: Put them in a basket or rack to air dry.
Drying herbs in a basket with holes works well in drier climes. Even so, there will be some variation. Where I was raised, in the Sacramento Valley in California, I could toss almost any herb into a basket in the summertime and two or three hours later, it would be dry. In a moderately dry climate, you’ll want to spread the herbs out in the basket, keeping them separated to prevent mold.
Either way, keep the basket out of direct sunlight and blowing air, which in my experience, saps the flavor and beneficial constituents from the plants.
Advertisement
This ad is displayed using third party content and we do not control its accessibility features.
Method 2: Hang them to dry in bundles.
If you live in a moist climate or it’s a moist season, hanging the herbs is likely a better approach than the basket.
For this method, loop a string around the herb stems and hang the bundle high because heat rises. I have a baseboard in my kitchen with little nails along it, and I hang the bundles from that. As the herbs hang, make sure they are exposed to air all the way around. Again, you don’t want them in direct sunlight.
If you’re dealing with a more moist plant like peppermint, you’ll want to hang individual stems. If a tiny bit of the leaf folds over on itself, the place where it folds can turn black, and you don’t want that.
Method 3: Put them in a dehydrator.
If you find that your climate fluctuates quickly between moist and dry and your herbs get moldy, or maybe they never dry in your humid climate, that’s when you get a dehydrator. This speeds up the process and adds consistency.
There are many types of dehydrators. To preserve the nutrients, you want to make sure you don’t overheat them, so look for a dehydrator that lets you keep the temperature at 100°F or lower. I have an Excalibur, which I like because I can lay things out and control the temperature.
Advertisement
This ad is displayed using third party content and we do not control its accessibility features.
When are they done?
No matter which method you choose, the herbs are “done” when they’re brittle and easy to crumble. If you live somewhere dry, your herbs may easily air dry in just a few days. If you live in a moist and humid climate, your herbs may take four weeks to dry thoroughly, and you may choose to use a dehydrator to speed up the process. Before you store the herbs, check for mold and discard any moldy herbs.
The takeaway
As I mentioned before, drying herbs is an art and may take some practice. Don’t get discouraged if they’re not perfect the first time. I learned all of the tips here from trial, error, and a willingness to learn from my mistakes. That’s the process of discovery that ultimately brings us into deeper wisdom and connection to the plants!