If your body was a rock band, your triceps would be the bass player. Your legs would be on drums, biceps would be lead guitar, and calves would be the roadie, but that’s all beside the point. Few people seem to pay attention to the triceps, but they’re hard at work in nearly every lift, and they’re essential for almost every goal.
Often neglected and underappreciated, your triceps can dramatically impact your physique and your performance. It doesn’t take much work to build bigger, stronger tris, but it does take some intelligent training. Here are the best movements to put this muscular background player on centerstage.
Best Triceps Exercises
- Close-Grip Bench Press
- EZ-Bar Skull Crusher
- Barbell Kickback
- Dumbbell Overhead Extension
- Two-Dumbbell Kickback
- Neutral-Grip Dumbbell Bench Press
- Single-Arm Skull Crusher
- Dip
- Close-Grip Push-Up
- Medicine Ball Push-Up
- Tiger Bend Push-Up
- Rope Pushdown
- Single-Arm Pushdown
- Single-Arm Standing Cable Skull Crusher
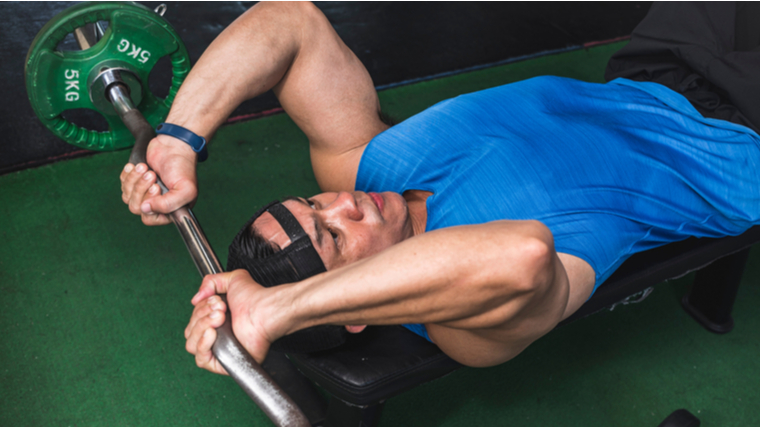
Close-Grip Bench Press
The classic flat bench press is a staple in many lifters’ chest workouts. When you bring your grip slightly inwards, you can shift the emphasis away from your chest muscles and make your triceps the primary mover. (1)
Pressing with a closer grip increases triceps recruitment and decreases relative chest activation. It can also reduce strain on your shoulder joints because they are placed in a stronger mechanical position with less stretching. This makes it an effective bench press alternative for lifters dealing with joint pain.
How to Do the Close-Grip Bench Press
Lie on a flat bench with the barbell in line above your eyes. Grab the bar using a palms-down (pronated) grip with your hands and wrists directly above your shoulders. Gripping extremely close doesn’t significantly affect triceps recruitment and can increase strain on the wrist and elbow joints.
Plant both feet flat on the ground. Squeeze your shoulder blades together and grip the bar tightly. Press straight up to unrack the bar from the support pins. Lower the bar while keeping your elbows close to your body, not flaring out to the sides. In the bottom position, the bar should be near your lower chest. Pause briefly before pressing straight up to lockout. Keep your glutes touching the bench throughout the entire repetition.
Benefits of the Close-Grip Bench Press
- This bench press variation allows the triceps to be worked with potentially heavy weights, making it ideal for building triceps strength.
- The overall joint position of this exercise allows lifters to train the bench press movement pattern with reduced shoulder joint stress.
EZ-Bar Skull Crusher
The skull crusher is a basic and effective exercise for isolating the triceps with limited activation of the chest or shoulders. Using an EZ-bar changes your hand position and allows a semi-supinated, or angled, grip. This makes the exercise more accommodating for lifters with poor wrist mobility who can’t maintain a fully supinated (palms-down) grip, and it helps to reduce strain on the wrist and elbow joints.
The EZ-bar skull crusher is one of the most fundamental triceps exercises, requiring only a flat bench and an EZ-bar. This makes it an ideal option for lifters with limited equipment, such as training in a basic home gym.
How to Do the EZ-Bar Skull Crusher
Sit on a flat bench while holding an EZ-bar with a moderate-width, palms-down grip on the angled handles. Lie back while “kicking” the bar into a straight-arm position above your face. To maximize muscular tension, your arms should be angled slightly toward your head, not completely vertical.
Place both feet flat on the floor and tense your abs as you stabilize the weight in a locked-out position. Bend at your elbows to lower the weight towards your forehead. Keep your elbows stationary while reducing the weight. Straighten your arms to lock the weight above your head.
Benefits of the EZ-Bar Skull Crusher
- The EZ-bar reduces wrist and elbow joint strain, making it a good triceps exercise for lifters with joint pain.
- You can increase the intensity of the exercise by increasing the range of motion. Lower the weight to the bench at the top of your head instead of stopping near your forehead. While this will require moving your elbows, the longer range of motion can increase overall muscle activation.
- The EZ-Bar skull crusher can be superset with a close-grip bench press using the same bar for a quick and effective high-intensity technique.
Barbell Kickback
This old-school bodybuilding exercise has seen a resurgence in popularity in recent years. Once considered a high-tension triceps-builder, it fell out of favor for no valid reason. The triceps undergo a long time under tension using only free weights, with no cable stations necessary.
While the exercise is often performed with a slightly rounded back, the spine isn’t under direct stress because the weight is supported through the arms. If your hamstring mobility needs improvement, maintaining the bent-over position may be uncomfortable, and you may need to bend at a higher angle or choose an alternate exercise.
How to Do the Barbell Kickback
Begin standing while holding a barbell with a palms-down grip behind your back. Bend forward at the waist and allow the bar to slide down the back of your legs. Pull your elbows up near your ribs. The bar should be near your knees or upper calves, depending on your arm and leg length.
Straighten your arms by pressing your hands backward. Keep your elbows pinned in place during the exercise. With your arms locked out, the bar often ends above your tailbone. It’s not uncommon to feel your triceps cramping hard in the locked-out position when the muscle tension is greatest. Lower the weight under control and avoid hitting yourself behind the knees with the bar.
Benefits of the Barbell Kickback
- The barbell kickback delivers a significant muscle-building stimulus with relatively light weight, making it ideal for lifters using limited equipment or those unable to lift heavy weights.
- The triceps are put through a long time under tension, specifically with a long peak contraction, which creates a significant muscle-building stimulus. (2)
- This exercise is one of relatively few isolation (single-joint) triceps exercises that can be performed with a barbell, making it a valuable addition for lifters with limited equipment.
Dumbbell Overhead Extension
Performing triceps exercises with your arms overhead is essential for maximum triceps growth due to the unique positioning of the triceps heads across the shoulder joints. The separate muscle heads are activated differently as you raise your arms to work the triceps. (3) The dumbbell overhead extension is one of the most basic exercises to address this type of exercise.
The dumbbell overhead extension can be performed standing with your feet together, standing in a split or staggered stance, tall kneeling, half-kneeling, seated with an unsupported back, or seated with a back support. Each of those variations will work the triceps the same. The only difference is descending levels of core and lower back recruitment, so choose the stance that best suits your body.
How to Do the Dumbbell Overhead Extension
Hold one dumbbell with two hands, placing the pinkies of each hand against the inside of the top weight plate. Extend the dumbbell directly overhead with straight arms. Bend your arms to lower the weight behind your head. Keep your elbows pointed up as the weight moves, don’t allow them to sink towards your shoulders.
Resist the temptation to nod your head forward “out of the way” of the dumbbell. Lower the weight under control to avoid contacting your head or neck. Return to the overhead position when you feel a significant stretch on the triceps.
Benefits of the Dumbbell Overhead Extension
- The overhead extension is an efficient way to recruit all heads of the triceps muscle.
- Because you’re lifting with both hands, you can move heavier weight than training unilaterally (one arm at a time). This makes it a useful exercise for building strength.
- This exercise emphasizes the stretched position, which has been shown to improve muscle-building. (4)
Two-Dumbbell Kickback
While the single-arm kickback is more commonly associated with “toning”-type workouts, the two-dumbbell kickback combines the focused muscular tension of the single-arm kickback with improved coordination and total-body tension of a two-arm movement.
The two-dumbbell kickback also allows lifters to rotate their wrists during the movement for a more natural range of motion with less stress on the wrist and elbow joints.
How to Do the Two-Dumbbell Kickback
Stand upright while holding a dumbbell in each hand. Bend as far forward at the waist as is comfortable and slightly bend your knees. Pull both elbows to your ribs and bend your arms to a roughly 90-degree angle. Keep your elbows pinned to your sides during the entire set.
Using a relatively slow speed to minimize momentum, straighten your arms by driving your pinkies towards the ceiling. In the locked-out position, your arms should be in a straight line pointed toward the wall behind you. Experiment with a neutral grip (palms facing your body), a pronated grip (palms facing the wall behind you), and a supinated grip (palms facing your shoulders) to determine which feels most comfortable.
Benefits of the Two-Dumbbell Kickback
- The two-dumbbell kickback allows significant triceps tension with relatively light weights, making it ideal for lifters with joint pain or limited equipment.
- This movement simulates a cable triceps pushdown without needing a cable pulley station.
Neutral-Grip Dumbbell Bench Press
Much like the close-grip bench press is a triceps-dominant version of the classic movement, the neutral-grip dumbbell bench press is a triceps-dominant variation of the standard flat dumbbell bench press.
The neutral grip allows the elbows to remain close to the body, reducing shoulder joint stress while increasing triceps muscle recruitment. (5) The pressing position also allows the use of relatively heavy weights. Many people will press as much or more weight as with a chest-focused dumbbell bench press grip, making the movement an excellent option for building size and strength.
How to Do the Neutral-Grip Dumbbell Bench Press
Sit on a flat bench while holding a pair of dumbbells resting on your thighs. Lie back while kicking the weights into a straight-arm position locked above your chest. Plant your feet flat and slowly rotate your hands to face each other.
Stabilize the weight and lower the dumbbells towards the outside of your chest. Slide your upper arms along your ribs and keep your elbows pointed towards your feet. When your hands are at chest-level, press straight up to lockout.
Benefits of the Neutral-Grip Dumbbell Bench Press
- This dumbbell press variation allows the use of fairly heavy weights with reduced joint strain.
- The unique hand position makes the neutral-grip dumbbell bench press one of the few dumbbell exercises to safely and efficiently train the triceps with heavy weight.
- The exercise is effective for lifters who cannot perform the flat dumbbell bench press due to shoulder or elbow joint pain.
Single-Arm Skull Crusher
This exercise is nearly identical to the barbell or EZ-bar skull crusher, with the obvious exception that it’s performed using one arm at a time. This unilateral focus allows lifters to address development discrepancies and muscular imbalances between sides.
The single-arm skull crusher also allows lifters to manipulate their wrist more freely by rotating during the movement, which can alleviate wrist discomfort caused by maintaining a pronated (palm-down) grip on a barbell.
How to Do the Single-Arm Skull Crusher
Begin lying with one dumbbell locked out above your chest. Use your non-working hand to gently hold the triceps of the working arm. This can increase the mind-muscle connection and improve growth. (6)
Lower the dumbbell towards the same-side ear at a slow and controlled pace. Keep your elbow aimed at the ceiling, and don’t allow it to move. When your arm has reached its maximum stretched position, reverse direction and lockout your arm.
Benefits of the Single-Arm Skull Crusher
- This exercise allows extremely focused training on the triceps of each arm.
- The single-arm skull crusher delivers a significant muscle-building stimulus with relatively light weight.
- The unilateral performance allows lifters to address common muscle imbalances between arms.
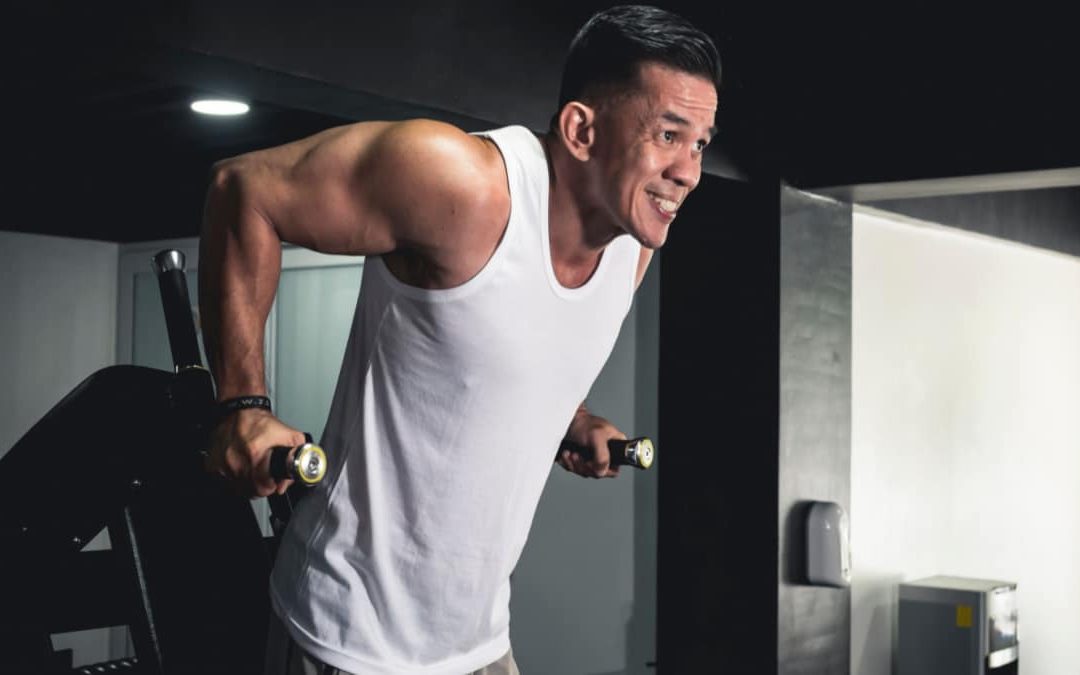
Dip
The dip is one of the most effective bodyweight exercises to train the triceps because it allows you to lift a significant amount of weight without needing a full gym setup. Whether it’s wearing a weighted vest, a dip belt with random weight plates, or a backpack full of soup cans, the weighted dip allows you to emphasize the triceps while working the entire upper body.
Dips can also be performed to emphasize the chest instead of the triceps, but straightforward technique adjustments can keep the triceps prioritized.
How to Do the Dip
Hold a set of dip handles with your hands slightly outside shoulder width. Jump into the top position and lock your arms out straight. Stabilize your upper body and eliminate any lower-body swinging. Bend your arms while aiming your elbows at the wall behind you.
Maintain an upright torso position with your head and shoulders in line with your hands. Lower your body at a controlled speed until you feel a maximum stretch in your shoulders. Pause briefly in the bottom position before pressing up to lockout.
Benefits of the Dip
- The dip is one of the few bodyweight exercises that allows the addition of significant load for long-term progression.
- You can begin a set with the triceps-emphasizing technique and, when muscular fatigue sets in, change focus to incorporate the chest muscles — during the descent, lean your upper body forward and allow your elbows to flare out to the sides. This is a high-intensity technique to increase overall muscle stimulus.
Close-Grip Push-Up
While the standard push-up is often the first bodyweight exercise — or even the first exercise, in general — many lifters perform. However, the close-grip variation is an effective way to emphasize the triceps without any training equipment at all.
The close-grip push-up, similar to the close-grip bench press, shifts the focus away from the chest muscles and makes the triceps the predominant muscle group.
How to Do the Close-Grip Push-Up
Start with your hands planted on the ground roughly chest-width apart. Straighten your legs and maintain a stable line from your neck to your feet. Lower your entire body until your chest nearly touches your hands.
As you descend, keep your elbows tight to your body and aimed towards your feet. Pause briefly in the bottom position before returning to full lockout.
Benefits of the Close-Grip Push-Up
- The close-grip push-up has been shown to activate the triceps significantly more than the standard push-up technique. (7)
- This exercise can be performed anywhere, at any time, without needing any special equipment.
Medicine Ball Push-Up
Medicine balls are often for throwing or adding resistance during workouts. With this push-up variation, it’s doing neither. The medicine ball is used as a support for your hands and encourages a close-grip position.
The medicine ball also slightly elevates your upper body, which alters your leverage and reduces the amount of body weight lifted during the exercise. This may sound like it makes the exercise “easier,” but it’s offset by the increased challenge from the grip width and instability.
How to Do the Medicine Ball Push-Up
Place a sturdy medicine ball on the ground — the weight of the ball doesn’t affect the exercise. Place both hands on the ball and support your body with straight arms and legs. Stabilize your entire body, and don’t allow the ball to roll or wobble.
Lower your chest towards the ball, being sure to control any instability provided by the ball. When your chest contacts the ball, press up at a controlled pace until your arms are locked.
Benefits of the Medicine Ball Push-Up
- The instability from the medicine ball is an efficient way to strengthen shoulder stabilizing muscles.
- The medicine ball provides a consistent reference point for grip-width, rather than focusing on chest-width or closer-than-shoulder-width, making the exercise more simplified and effective.
- Medicine ball push-ups can be quickly superset with medicine ball throws for a power-building workout.
Tiger Bend Push-Up
At first glance, the tiger bend push-up might appear to be some kind of yoga-meets-gymnastics combination. In reality, it’s a relatively advanced push-up variation that emphasizes the triceps by requiring an extension-type movement more than an actual push-up.
The tiger bend push-up is considered a somewhat advanced exercise because your triceps are required to move the majority of your body weight without assistance from your shoulders or chest. However, there are specific regressions to adjust the challenge for any lifter.
How to Do the Tiger Bend Push-Up
Kneel on the ground with only your forearms, elbows, knees, and shins supporting your body. Place your palms on the ground. Set your elbows beneath your shoulders and your knees directly under your hips. Lift your body by pressing through your palms. Maintain a neutral spine as you move.
To make the exercise more challenging, move your knees farther from your elbows and eventually support yourself off your knees, with a straight line from your shoulders to your feet. To make the exercise less challenging, set your knees wider.
Benefits of the Tiger Bend Push-Up
- This exercise is one of the few isolation (single-joint) bodyweight exercises to work the triceps, which adds to overall exercise variety.
- It provides a significant challenge without added weight, making it ideal for experienced lifters with limited equipment.
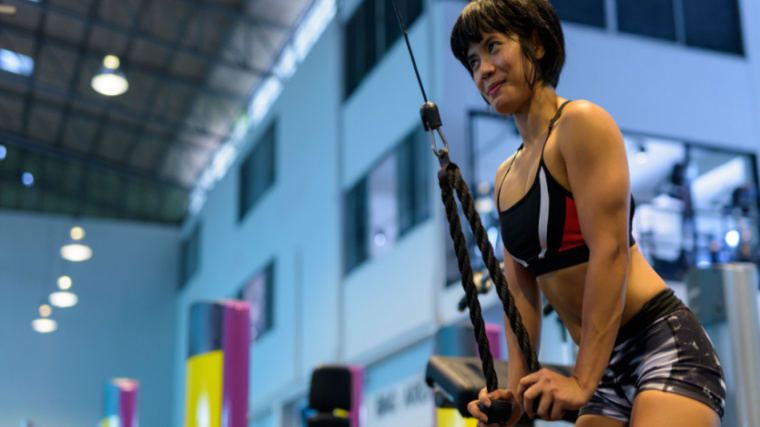
Rope Pushdown
The triceps pushdown, sometimes called a pressdown, may be one of the most common exercises seen in any gym. It’s simple to perform, effective at targeting the triceps, and adaptable to beginners as well as the most experienced lifters.
Using a rope handle allows a neutral (palms-facing) grip which can reduce wrist strain compared to a straight bar which requires a palms-down grip. The rope can also be manipulated throughout the set, by bringing the handles apart in the bottom position to increase the range of motion or keeping the handles touching for improved leverage to perform additional reps.
How to Do the Rope Pushdown
Begin with a rope handle attached to a high-cable pulley. Grab the rope with both hands and bring your elbows next to your ribs. In the starting position, your hands should be near chest-level.
Without moving your elbows, straighten your arms. Pause briefly in the locked out position before returning your hands to the top.
Benefits of the Rope Pushdown
- The pushdown can be performed by lifters of any experience or strength level.
- This cable exercise offers continuous tension, which increases the total time under tension and improves the muscle-building stimulus.
- The rope pushdown helps to reduce joint strain by allowing more comfortable joint angles.
Single-Arm Pushdown
The single-arm pushdown combines the focused benefits of unilateral training with the high-tension muscle-building of cable training. By working each arm individually, you’re able to address discrepancies in muscular development and strength without compromising any muscle-building stimulus.
This intense pushdown variation can be performed with a variety of handles and grip positions. Using a single “D” handle is most common, either with a palm-up or palm-down grip. Experiment with using a rope handle (holding one or both sides of the rope in one hand) as well. The different hand and wrist positions may feel more comfortable and won’t affect the triceps recruitment significantly.
How to Do the Single-Arm Pushdown
Attach a handle to a high-cable pulley. Grab it with one hand and bring it into the starting position with your elbow near your ribs and your working hand near chest-level. Your free hand can brace against the pulley station away from the cable.
Straighten your arm and press down to full lockout. Don’t allow your elbow to move and don’t allow your torso to lean sideways towards the working hand. Pause briefly in the bottom position before returning to the top.
Benefits of the Single-Arm Pushdown
- The single-arm pushdown emphasizes each individual arm without significant core work due to the stability of the cable station, making it ideal for lifters with lower back pain.
- The exercise can be performed with a variety of grips to accommodate lifters with grip strength issues or wrist pain.
- This pressdown variation can also be performed “crossbody-style” — standing sideways to the cable stack, with the non-working side of the body closest to the cable, and bringing the working hand from the opposite shoulder to the same-side hip. The unique angle changes the range of motion and may reduce shoulder joint strain.
Single-Arm Standing Cable Skull Crusher
This unique exercise uses a cable pulley to mimic the motion of a single-arm dumbbell skull crusher. The increased tension from the cable allows a strong muscle-building stimulus with relatively light weight and less overall joint strain.
Whether it’s simply for training variety or as a high-intensity triceps finisher at the end of any workout, this movement zones in on the triceps with maximum efficiency and no assistance from other muscle groups.
How to Do the Single-Arm Standing Cable Skull Crusher
Grab a single handle attached to a high-cable pulley. Face away from the weight stack and press the weight straight in front of you. Use your non-working arm to support the working-side elbow, which should remain stationary throughout the set. Slowly bend your arm and bring your hand back towards your face. When you feel a maximum stretch, slowly extend your arm to full lockout.
Benefits of the Single-Arm Standing Cable Skull Crusher
- This exercise delivers a significant time under tension, which is beneficial for muscle growth.
- The single-arm standing cable skull crusher allows the triceps to be trained with minimal strain on the shoulder and elbow joints.
The Triceps Muscles
Understanding the triceps muscle and its related joints will lead to a better understanding of how and why certain exercises and training methods are effective.

Here’s a closer look at this critical arm muscle and how it works.
Triceps Brachii
The “tri” in triceps refers to three separate but related heads of the muscle. The medial head and lateral head both attach at the upper arm bone and elbow joint. The long head attaches at the elbow and shoulder blade.
All three heads work to straighten the arm at the elbow. However, because the long head runs over and across the shoulder joint, it is also activated when the upper arm moves. (8) This is why triceps exercises performed at a variety of angles — with your arms overhead and/or perpendicular to your body — are essential for overall muscle activation and development.
How Often Should You Train the Triceps
Because all three heads of the triceps attach at the elbow joint, excessive training volume or frequency may aggravate (or create) joint pain or tendonitis. The triceps are significantly worked during the majority of chest and shoulder exercises, which needs to be a factor when programming triceps training.

Generally, directly training the triceps one to two days per week with relatively low volume per workout (five to 10 sets split up between one to three exercises) can be sufficient for building size and strength. The overall details of your training program such as exercise choice, training intensity, and volume (total sets and reps) will be factors in designing a triceps workout.
To make your triceps a training priority, reduce the frequency and volume of pressing in your chest and shoulder workouts. This will help to reduce the overall stress on the triceps muscle and related joints. Training your triceps and biceps in one workout is another highly effective method, especially when using alternating sets or supersets, which have been shown to improve power and strength while reducing overall fatigue. (9)
How to Progress Your Triceps Training
Triceps workouts can be approached and progressed like any other body part. Work consistently and gradually increase the training volume (more repetitions) and/or increase the training load (more weight). The decision to increase volume or load will be determined by your goal, as well as the specific exercises being used.
Isolation (single-joint) exercises like the two-dumbbell kickback or single-arm pushdown don’t typically accommodate very heavy loads because proper technique becomes unmanageable. A focus on increasing volume is typically more effective for those types of exercises.
Compound (multi-joint) exercises like the close-grip bench press and dip do allow you to safely and efficiently work up to heavier loads eventually, as long as you never sacrifice form for the sake of more weight.
How to Warm-Up Your Triceps
Warming up the triceps is about preparing the muscle for the stimulus of the workout. It’s also about preparing the joints, specifically the elbow joints, because they will be significantly worked in each exercise.
Light weight, high-rep isolation exercises are one effective way to prepare your elbows for intense triceps training. Focus on warming up with exercises which don’t put the arms into an excessive stretch. As the warm-up progresses and your arms are better prepared, gradually increase the range of motion and variety of exercises.
For example, warming up with rope pushdowns for one to two sets of 20 reps can be safer and more joint-friendly than performing the dumbbell overhead extension for the same sets and reps.
Don’t Tri Too Hard
Triceps training shouldn’t overwhelm your workout program, it should complement it, like a solid bass line in any great song. It might be understated and simple, but it delivers the goods and keeps you on track. If you dial things up too hard and hit the tri’s with too much work, you’ll invite potential injury, compromise the rest of your plan, and your name might as well be Mud.
References
- Lockie, Robert & Moreno, Matthew. (2017). The Close-Grip Bench Press. Strength and Conditioning Journal. 39. 1. 10.1519/SSC.0000000000000307.
- Burd, N. A., Andrews, R. J., West, D. W., Little, J. P., Cochran, A. J., Hector, A. J., Cashaback, J. G., Gibala, M. J., Potvin, J. R., Baker, S. K., & Phillips, S. M. (2012). Muscle time under tension during resistance exercise stimulates differential muscle protein sub-fractional synthetic responses in men. The Journal of physiology, 590(2), 351–362. https://doi.org/10.1113/jphysiol.2011.221200
- Kholinne, E., Zulkarnain, R. F., Sun, Y. C., Lim, S., Chun, J. M., & Jeon, I. H. (2018). The different role of each head of the triceps brachii muscle in elbow extension. Acta orthopaedica et traumatologica turcica, 52(3), 201–205. https://doi.org/10.1016/j.aott.2018.02.005
- Oranchuk, D. J., Storey, A. G., Nelson, A. R., & Cronin, J. B. (2019). Isometric training and long-term adaptations: Effects of muscle length, intensity, and intent: A systematic review. Scandinavian journal of medicine & science in sports, 29(4), 484–503. https://doi.org/10.1111/sms.13375
- Lehman G. J. (2005). The influence of grip width and forearm pronation/supination on upper-body myoelectric activity during the flat bench press. Journal of strength and conditioning research, 19(3), 587–591. https://doi.org/10.1519/R-15024.1
- Oshita, Kazushige. (2021). Effect of internal focus of attention with touching cue on the agonist muscle activity during exercise. 10.14198/jhse.2021.16.Proc2.04.
- Kim, Y. S., Kim, D. Y., & Ha, M. S. (2016). Effect of the push-up exercise at different palmar width on muscle activities. Journal of physical therapy science, 28(2), 446–449. https://doi.org/10.1589/jpts.28.446
- Tiwana MS, Sinkler MA, Bordoni B. Anatomy, Shoulder and Upper Limb, Triceps Muscle. [Updated 2021 Aug 6]. In: StatPearls [Internet]. Treasure Island (FL): StatPearls Publishing; 2022 Jan-. Available from: https://www.ncbi.nlm.nih.gov/books/NBK536996
- Robbins, Daniel W; Young, Warren B; Behm, David G; Payne, Warren R Agonist-Antagonist Paired Set Resistance Training: A Brief Review, Journal of Strength and Conditioning Research: October 2010 – Volume 24 – Issue 10 – p 2873-2882 doi: 10.1519/JSC.0b013e3181f00bfc
Featured Image: MDV Edwards / Shutterstock