Talk to anyone in your average gym about training to build conditioning or cut body fat, and the Turkish get-up is probably not going to be one of the first exercises mentioned, if it comes up at all. It may not have the recognition as a squat or deadlift, but a lack of relative popularity and a unique execution shouldn’t be seen as a negative.
The Turkish get-up, or TGU, can be an effective tool for a variety of goals. This total-body exercise requires, and builds, a serious measure of athleticism. It requires very little loading or setup — if you have a single weight and floor space, you’re ready to rock. While the movement does require some degree of athletic capability, the risk:reward ratio is very favorable since the weight being lifted is light.
However, the Turkish get-up can take some time to learn. It’s not as simple as some other exercises, like curling a dumbbell or lifting a barbell off the ground. It’s time to learn all the steps of the Turkish get-up so you can take advantage of all the benefits it has to offer, from head to toe.
Turkish Get-Up
- How to Do the Turkish Get-Up
- Turkish Get-Up Mistakes to Avoid
- How to Progress the Turkish Get-Up
- Benefits of the Turkish Get-Up
- Muscles Worked by the Turkish Get-Up
- How to Program the Turkish Get-Up
- Turkish Get-Up Variations
- Frequently Asked Questions
Step-by-Step Turkish Get-Up Demonstration
Take a look at Coach Traver Boehm performing this comprehensive exercise in action, see all of the details involved, and then finish learning the guidelines and tips.
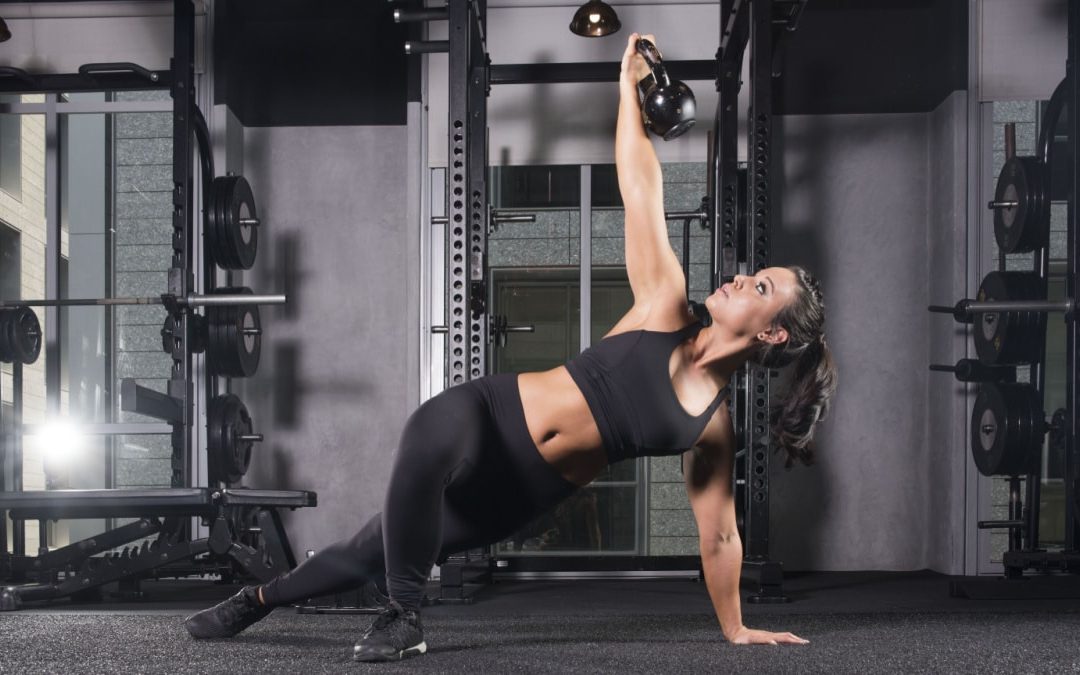
The Turkish get-up truly is a total-body exercise. It requires coordination and concentration to safely deliver results.
How To Do the Turkish Get-Up
Because the Turkish get-up uses so many muscle groups in a variety of movement patterns, the best way to approach the exercise is to compartmentalize each phase of this big lift for eventual mastery.
The exercise is most commonly performed with a kettlebell, but a dumbbell can be used instead. The kettlebell will slightly increase shoulder recruitment due to its offset center of gravity, compared to a more well-balanced dumbbell.
Step 1 — Start on the Ground
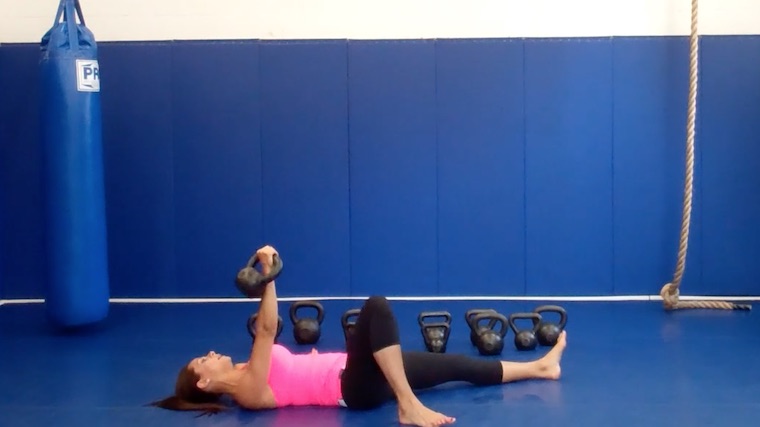
Lie on the floor with the weight placed near one shoulder. Roll your body toward the weight and grab the handle with the same-side hand. Support the weight with your opposite hand as you roll your back flat on the ground, using your body to help leverage the weight up to an extended-arm lockout position. Your arm, with the weight, should be aimed straight at the ceiling.
Bend your leg on the same side as your working arm. Keep your other leg straight, aimed slightly at an angle.
Form Tip: Making yourself “take up more space” in the beginning of the movement will come in handy in later phases of the lift. Your non-working arm and leg should be angled out to create a wide and stable base for the rest of the movement.
Step 2 — Roll to Your Elbow
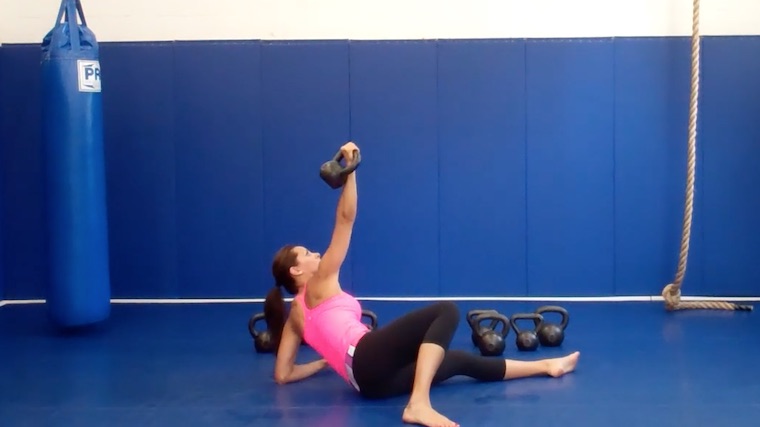
As you lie there with the loaded arm pointed up, keep your eyes on the weight. Stare at the weight in your hand throughout the exercise. Keep your working arm ramrod straight and vertical. Drive into the floor with your planted foot (on the bent leg) to create tension while using the hand, forearm, and elbow of your opposite arm to lift your torso off the ground. Use the floor to your advantage as a leverage point. Continue letting the raised arm “lead the way” to help you upward. Don’t look away from the weight overhead.
Form Tip: It’s crucial that the knuckles of your working arm face the ceiling at all times. That means keeping your arm pointed straight upward, perpendicular to the floor. Nothing can compromise this position, no matter how your body moves underneath it. That also means it’s imperative your elbow doesn’t bend. It may ask a lot of your shoulder mobility, but it will also deliver strength and stability.
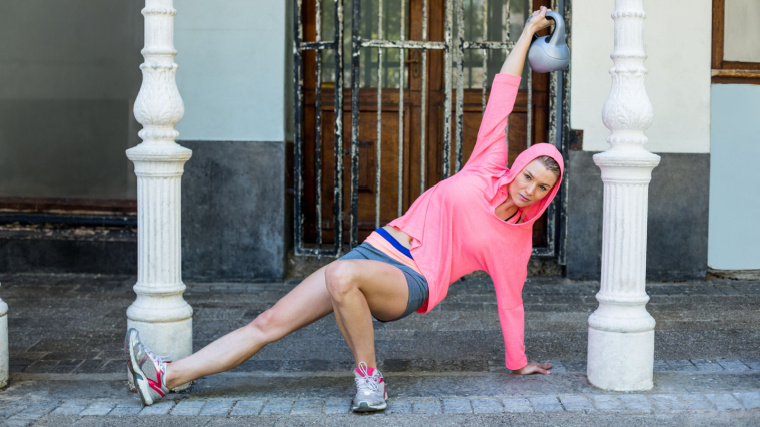
Step 3 — Drive Up to Your Hand
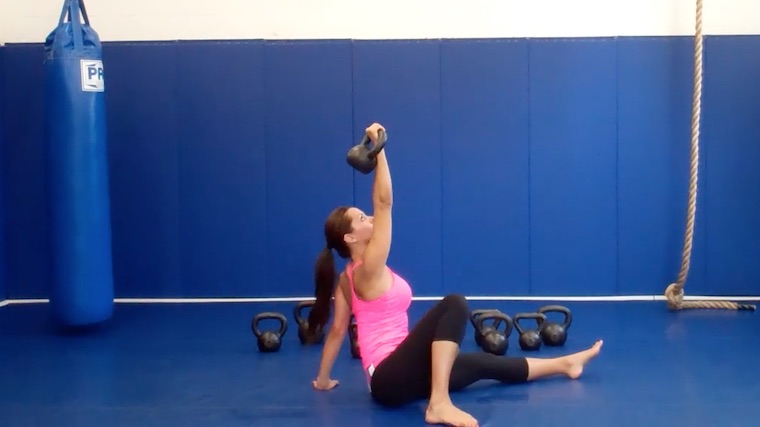
At this stage, your torso should be off the ground, supported on your forearm, and your butt should still be planted. Get “tall” by pressing your forearm hard into the ground and raise onto just your hand, instead of that entire forearm. Both arms should be straight — one supporting the weight overhead and the other placed palm-down on the floor. If the hand on the floor feels unstable or too far from your body, adjust and bring it in a bit closer to your hips to help your stability.
Form Tip: Because the Turkish get-up involves multiple steps, it can help to briefly pause after each separate phase to assess your body position. Gradually, as you get more experienced, the individual segments can flow together more smoothly. For example, some lifters are more comfortable “combining” the roll to their elbow (step two) with the hand-supported position (step three), which brings them from lying flat on the floor right up to a straight-arm support, before continuing the movement.
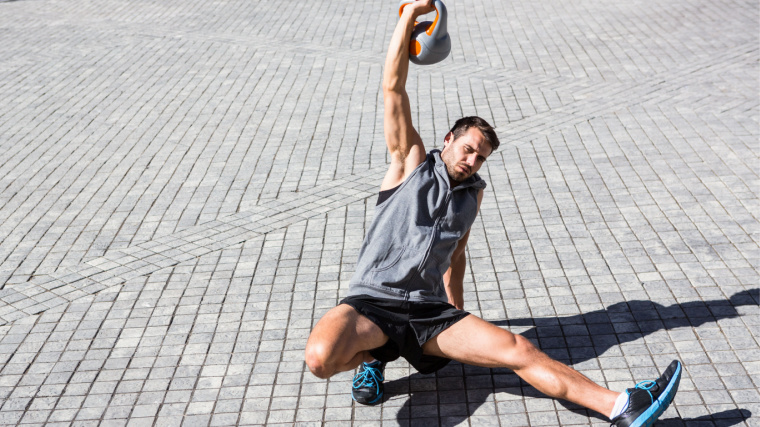
Step 4 — Hips Up, Leg Through
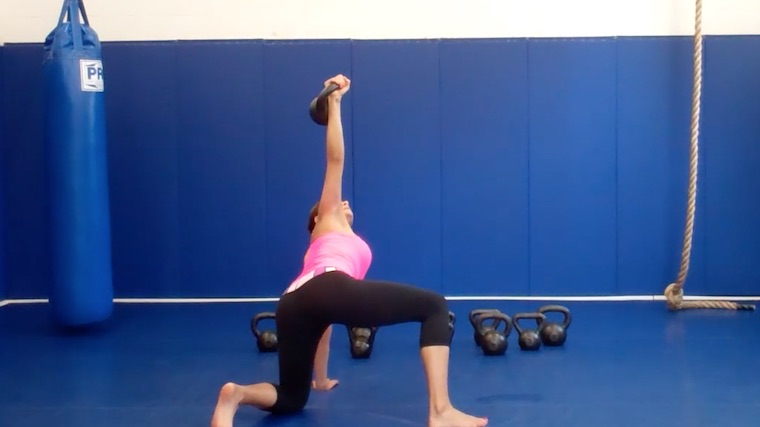
Press your hand and the foot of your bent leg into the floor hard enough to lift your hips off the ground. This must be done carefully and precisely — remember, you still have to control a weight over your head in a locked out position.
Raise your hips as high as your flexibility and strength will allow. The higher you can get them, the easier the next step will be. It helps to squeeze the glute of your bent leg to help with full hip extension. Allow your body to slightly turn toward the hand on the ground, away from the weighted hand.
Briefly pause before carefully bringing your straight leg back through the space you’ve just created by bridging your hips up. Gently pick up your straight leg, tuck your knee, and think about bringing your knee “behind” your body, not just under it. Plant that knee firmly on the ground. You should now have one hand, one knee, and one foot on the ground. And you should still be looking at the weight.
Form Tip: It’s okay if your knees point in different directions. It’ll actually make for more stability if you plant your second knee at an angle rather than straight on.
Step 5 — Kneel Tall, Then Stand
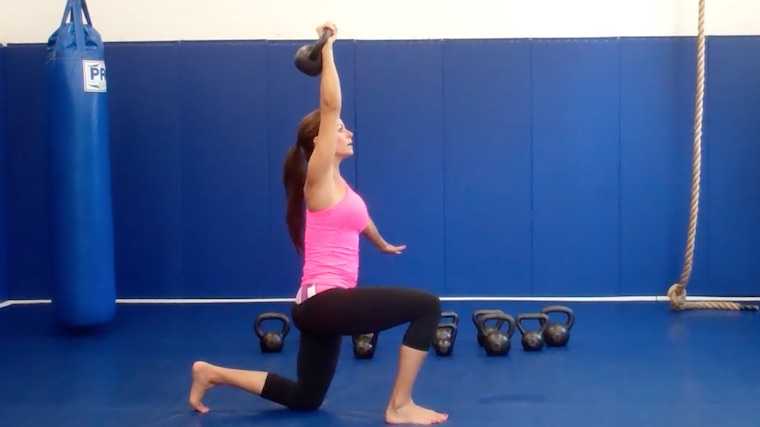
Use core strength to straighten your torso as you take the planted hand off the ground and settle in a half-kneeling position. Keep your eyes on the prize while you think of your obliques firing hard to bring your body vertically under the weight. Remember, the weight shouldn’t really move much — rather, your body should move to be positioned under the weight.
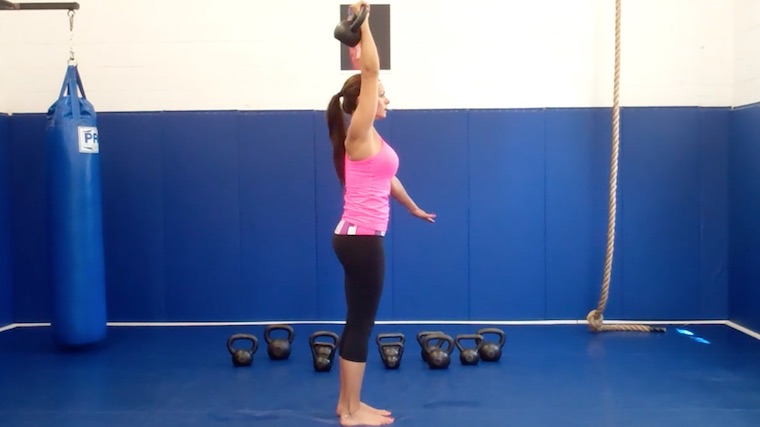
From the half-kneeling position, perform a basic lunge to stand up — drive through your front foot and bring your feet together in a standing position. You should finish this phase of the exercise fully upright with the weight still locked out overhead.
Form Tip: Some lifters add an additional step after the half-kneeling position, bringing their leg up into the bottom of a squat (instead of a lunge), before standing up. That is a relatively advanced option which requires more hip and shoulder mobility. Stick with the standard lunge position, which has the added benefit of increased core recruitment due to the single-leg movement.
Step 6 — Get Back Down
Standing up is only half the battle. One full repetition requires lying back down, too. The ground won’t go anywhere, so keep your eyes on the weight and learn to reverse your actions by feel, and not by looking down. If you break your focus, the weight will fall. You’ve done everything necessary to get to the top, so shift it in reverse to get to the bottom.
Step back with the same knee that just came forward (opposite your working arm) and lunge backwards to lower your shin and knee to the ground under control. Plant your non-working hand on the ground in line with your hips, at the side of your body and not behind it. This hand position is important for preventing you from sitting down on your back heel. It will also give your body enough space to create a bridge and pick up your planted knee, so your leg can travel through to its original straight-leg position. Slowly bring your leg forward. Plant your glutes on the ground under control.
Finally, keep your palm down as you slide your arm away from your body until your elbow contacts the ground. Slowly roll your upper body down until your shoulders and back are on the ground. You should be lying down again by this point, with the weight aimed at the ceiling, which means it’s time to put the weight down beside you. Lower the weight until your elbow gently touches the ground. Use your free hand to lower the weight completely to the floor.
Form Tip: Because the exercise can seem complicated and involved, some lifters may be more comfortable initially performing it either with no weight in their hand or while holding an empty cup in the palm of their hand. The lack of resistance can make it more difficult to feel your arm remaining vertical, but it will allow you to focus on the step-by-step instructions.
Turkish Get-Up Mistakes to Avoid
The step-by-step instruction should cover many troubleshooting issues, but there are some specific technique errors worth highlighting or reinforcing.
Looking Away from the Weight
“Where your eyes go, your body follows.” This saying applies to athletics, dance, and even weight training. Shifting your visual focus can influence your body’s posture and movement. (1)(2) This is why, with the Turkish get-up, it’s crucial to fix your eyes on the weight overhead instead of looking at the ground as you move your hands and feet.
If your eyes drift down to the floor, your arm holding the weight overhead is much more likely to drift off a vertical plane, which increases strain on your shoulder joint and puts your arm in a potentially dangerous angle.
Avoid it: This may sound overly simple, but remember to keep looking at the weight overhead. The basic cue of looking at the weight in your hand can be worth its weight in gold when it comes to keeping a stable and balanced overhead position. Using a mirror doesn’t count because you’re eyes are looking forward (at the mirror), not overhead.
Letting Your Elbow Bend
Unlocking your straight arm on the working side is an instant way to leak strength and have an unsuccessful repetition. Keeping your arm locked out overhead engages your triceps, shoulders, and upper back, which gives you more control over the weight.
Bending your elbow also puts the weight in an inefficient position overhead, so you’re forced to realign your arm and torso to keep the load over your center of gravity. These adjustments trickle downhill and require changing your technique in each step of the exercise to stay in a powerful and stable position.
Avoid it: Keep your elbow locked out by thinking you’re also doing a shoulder press. It should feel like you’re constantly fighting to complete a press through each phase of the get-up. Doing so can be the difference between a successful rep or an unsuccessful rep that comes crashing down – possibly taking your rotator cuff along for the ride.
Keeping Your Feet Too Close Together
Using a bunched-up stance with your feet awkwardly close can prevent a proper base of stability. In addition, after bridging your hips up, there won’t be enough space for your free leg to travel through without catching your other (planted) foot along the way. Essentially, you end up tripping over your own two feet.
Avoid it: Make a conscious effort to spread your feet apart both when you’re lying down and as you begin to stand. It’ll set the tone for the rest of the lift. Keep your feet no closer than shoulder-width to allow a smooth flow to the standing position.
How to Progress the Turkish Get-Up
Technically, the Turkish get-up itself is an advanced progression because it’s the culmination of so many different steps. Breaking the movement down and drilling individual phases of the exercise is one smart way to work toward a full get-up.
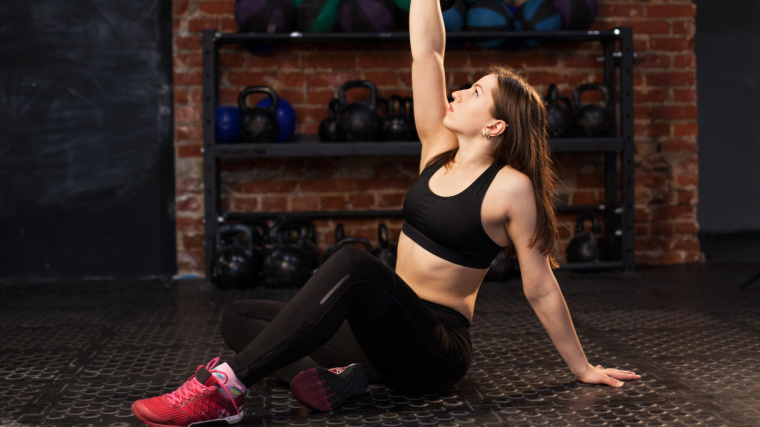
Turkish Sit-Up
Practicing the first “half” of the Turkish get-up, rising from flat on your back up to your elbow or hand, is an effective way to practice the initial position while strengthening your core, shoulders, and back.
To do these, it’s simply a matter of performing the initial technique cues, based on what’s comfortable for you to achieve, position-wise. As you grow more accustomed to the movement, reaching an elbow-supported position, a hand-supported position, or a low bridge position can make the full Turkish get-up feel as smooth as butter.
Benefits of the Turkish Get-Up
The Turkish get-up is one of the most “full-body exercises” of all the full-body exercises. There’s not a muscle from head to toe that isn’t involved in moving or supporting the weight through the full range of motion. As such, it offers some unique benefits compared to many other movements.
Mobility
First and foremost, the TGU is a mobility mammoth. The get-up focuses on mobility of your hips, knees, ankles, thoracic spine, and shoulders, on both the working (weight-supporting) side and the planted side nearest the ground. (3)
If you’re immobile in any of these areas, your body will let you know your weak points in a real hurry. Fortunately, working on appropriate progressions with appropriately light loading is a very effective way to address and improve those weak points.
Conditioning
Simply getting up and down from the floor can sometimes be enough to get someone’s heart rate up and keep it elevated. Adding a load and a ton of mental focus to the mix can make this even more muscularly demanding, in addition to the cardio demands already imposed. If you’re looking for better lungs and a bit of fat loss, you’ve stopped on the right movement.
Muscles Worked by the Turkish Get-Up
Simply put, the Turkish get-up works everything. It’s as “compound” a movement as you can get because it involves nearly every joint in your body, from ankles to elbows and everything in between.
While the emphasis may be on the shoulder complex, nearly every major muscle group including the abs, back, quads, glutes, and hamstrings plays a role in performing a successful rep.
Shoulders
All three heads of your shoulders (the front, rear, and side) are worked during the Turkish get-up. The shoulders of the weight-supporting arm are worked to stabilize the weight overhead as you move throughout space. Because the weight is constantly shifting, your shoulder is actively firing and micro-adjusting throughout the exercise. At the same time, the shoulder of your support arm is worked during the lower portion of the exercise to support your body as you rise off the floor.
Back
While most back exercises involve pulling or rowing motions, your entire back is worked during the TGU. Your lower back, as part of your overall core, works to maintain a safe and stable spine as you rotate, bend, and pivot from a lying to standing position. Your upper back assists shoulder stability and shoulder blade control to keep your arm secured overhead.
Abdominals
Your abs are worked in multiple directions, controlling your upper body position. They’re also worked statically to support many transition phases between steps, as well as dynamically as you bend sideways to maintain a vertical arm position. It’s not uncommon to feel soreness in your obliques (on the sides of your abs) due to the significant range of motion and time under tension.
Legs
While many see the Turkish get-up as an “upper body” exercise, your entire lower body also receives a significant stimulus. Your quads, glutes, and hamstrings are strengthened, particularly during the lunge phase to stand up, while your hips and hamstrings are put through a major mobility session as they go through kneeling and standing positions.
How to Program the Turkish Get-Up
While the Turkish get-up may seem like an advanced movement for athletic lifters, it can also work as a great drill in spatial awareness and neuromuscular coordination for beginning lifters. (4) Moreover, whether your goal is conditioning, strength, or hypertrophy, the TGU can find a place in a program either as a main part of the workout or as a post-workout finisher to get the last juice out of muscles that have been worked hard.
Light to Moderate Weight, Very Low Repetition
One reliable method to incorporate the Turkish get-up is to do sets of three to six sets of one to two reps per arm, alternating arms between each repetition. This is a great way to throw them into a workout, either on their own or as part of a superset, because the low reps allow you to further emphasize picture-perfect technique.
Reps For Total Time
Using the TGU as a “finisher” can be highly effective when performed for a fixed amount of time rather than aiming for a couple of individual repetitions. Making this change will take the emphasis off of the weight being lifted and shift focus more toward the cardio benefits.
One effective method here is to choose a comfortable weight based around your abilities (err on the side of going “too light”), and set a timer for anywhere between three and six minutes, and perform continuous reps (alternating arms). Try not to stop moving until the time has elapsed. It’s crucial that you don’t rush through the movements just to rack up more reps within the time limit — maintain your technique at all times.
After the very first minute, you’ll notice your entire body working hard, with your shoulders burning and your heart rate going through the roof.
Turkish Get-Up Variations
When and if you’ve mastered the Turkish get-up, you can actually move on to some simple, effective variations for an even greater challenge.
Barbell Get-Up
Performing a Turkish get-up with a barbell instead of a dumbbell or kettlebell is, arguably, one of the most eye-catching and attention-grabbing exercises you can see done in a gym. It also happens to be a highly challenging way to test your total-body strength and shoulder stability.
The length of the barbell means drastically increased instability. The bar will attempt to tip forward and backward, as well as rotate, as you move through the exercise. Exerting 100% control over the barbell and keeping it level requires high-level muscular control and coordination.
Turkish Get-Down
The Turkish get-down, sometimes called a reverse Turkish get-up, appears to be a simple reversal of the basic TGU. Instead of beginning in a lying position and working to stand up, you begin standing with the weight locked overhead, move to a lying position, and stand up again.
This is sometimes seen as a “regression” or easier variation of the basic TGU because many people are simply more comfortable in a standing start position. It can also be more accommodating for lifters who lack the necessary core strength to initially perform the sit-up portion of the basic TGU.
FAQs
How heavy should I lift?
Don’t expect to use tremendous weights initially. Your overall mobility will likely be the limiting factor, not your actual muscular strength. Depending on your hip and shoulder mobility, you may find as little as 10 or 20 pounds challenging enough to maintain good form.
However, it’s not uncommon for experienced lifters to perform good-looking reps with half of their bodyweight held overhead. The most important thing to remember is focusing on crisp, clean movements and never letting the weight get away from you during a repetition.
Is using a kettlebell better than a dumbbell?
The exercise technique will be the same no matter what you’re holding. It’s even the same if you’re performing the exercise empty handed. The biggest difference between using a dumbbell or kettlebell is that the kettlebell’s odd shape will shift the weight’s center of gravity “behind” your shoulder, so you’ll need to work even harder to maintain a vertical arm position.
That’s why a kettlebell will feel more challenging than a dumbbell of the same weight. For example, if you’re able to use a 30-pound dumbbell, you might struggle to control a 30-pound kettlebell. However, either can be effective for the exercise. Use whatever you have available and progress according to your capability.
The Get-Up Wrap-Up
The dynamic quality of this unique exercise can be the exact game changer that a lifter of any skill level needs take their gains to the next level. The problem with most gym training that it encourages some lifters to only focus on the specific task at hand – namely, performing a good-looking rep of whatever movement is being trained. The real challenge is finding movements that translate to real-life or athletics, like the TGU. Especially when it means you can nab some extra hip and shoulder mobility while building serious core strength. These types of movements are win-win.
References
- Imai, T., Moore, S. T., Raphan, T., & Cohen, B. (2001). Interaction of the body, head, and eyes during walking and turning. Experimental brain research, 136(1), 1–18. https://doi.org/10.1007/s002210000533
- Richard P. Di Fabio, Saurav Paul, Alongkot Emasithi, John F. Greany, Evaluating Eye–Body Coordination During Unrestrained Functional Activity in Older Persons, The Journals of Gerontology: Series A, Volume 56, Issue 9, 1 September 2001, Pages M571–M574, https://doi.org/10.1093/gerona/56.9.M571
- St-Onge, E., Robb, A., Beach, T. A. C., & Howarth, S. J. (2019). A descriptive analysis of shoulder muscle activities during individual stages of the Turkish Get-Up exercise. Journal of bodywork and movement therapies, 23(1), 23–31. https://doi.org/10.1016/j.jbmt.2018.01.013
- Ayash, Adam & Jones, Margaret. (2012). Kettlebell Turkish Get-Up: Training Tool for Injury Prevention and Performance Enhancement. International Journal of Athletic Therapy & Training. 17. 8. 10.1123/ijatt.17.4.8.
Featured Image: Paul Aiken / Shutterstock