Whether you call them boulder shoulders, capped delts, or the start of a classic v-taper, a set of muscular shoulders is one the most common aesthetic goals for many lifters.

That’s not to mention the overall performance boost you get from strengthening one of the most important joints in the upper body. Your shoulders are involved, to some degree, in almost all upper body movements. The versatile joint can perform a variety muscle actions in multiple directions.
To minimize your time and maximize your effort, your need to train the shoulders with a combination of exercises and motions. This means incorporating exercises designed for strength and power, high volume training, and isolation-focused work. Here is a rundown of the most effective exercises to attack your shoulders from all angles.
Best Shoulder Exercises
- Machine Shoulder Press
- High Incline Dumbbell Press
- Seated Arnold Press
- Single-Arm Standing Dumbbell Press
- Dumbbell Z Press
- Dumbbell Cuban Press
- Behind-the-Neck Press
- Military Press
- Push Press
- Machine Lateral Raise
- Cable Lateral Raise
- Chest-Supported Lateral Raise
- Machine Rear Delt Flye
- Single-Arm Cable Rear Delt Flye
- Pike Push-Up
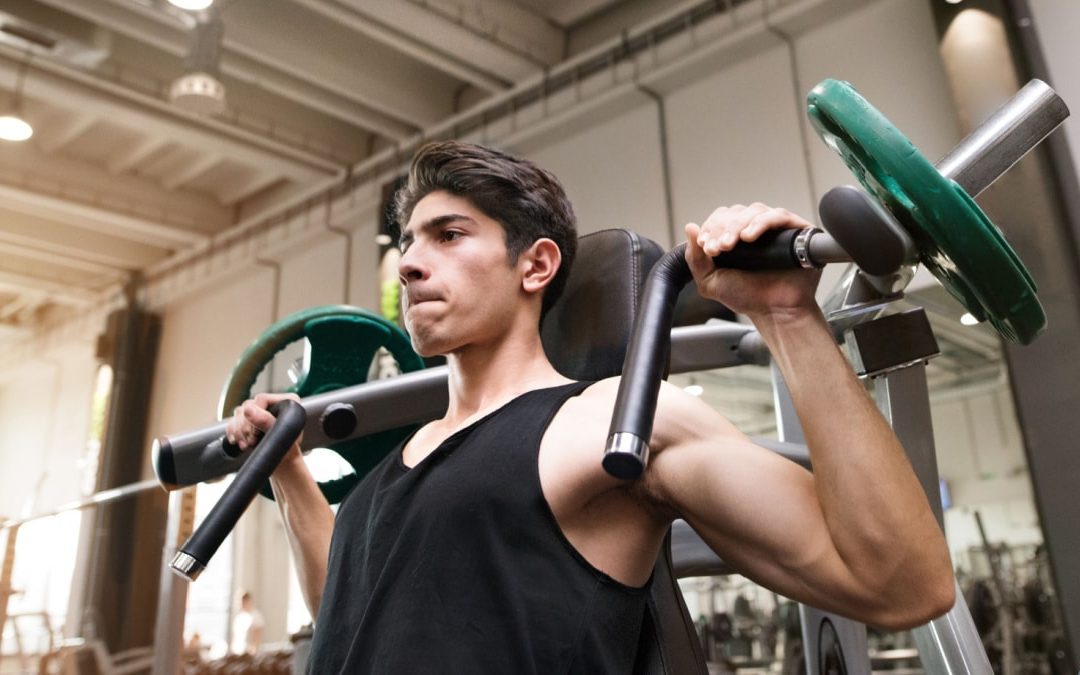
Machine Shoulder Press
In order to maximize muscle recruitment, you need to produce high levels of force. Being in a more stable and supported position allows you to direct that force into the exercise you’re trying to perform. This is why well-designed exercise machines can be invaluable.
Imagine trying to fire a cannon out of a canoe — it’s unlikely you’re going to hit your target. The machine shoulder press creates the most amount of total-body stability so you can take the muscles through a full range of motion with more focus. You can also safely take those muscles closer to failure without worrying about controlling free weights.
How to Do the Machine Shoulder Press
Adjust the seat height so that the handles are slightly below shoulder-height. This is going to make sure there is constant tension in the muscle throughout the whole range of motion. Take an overhand (palms facing away) grip. If you have limited shoulder mobility, use a neutral grip (palms facing each other).
Raise your feet with a box, step, or foot pegs if the machine includes them. Lifting your feet will elevate the knees so that you can more successfully keep your low back in contact with the bench for added support. A secure footing also makes you less likely to slide forward in the seat when the set becomes challenging.
Benefits of the Machine Shoulder Press
- This exercise allows focus on recruiting the shoulder muscles without concern for balancing and stabilizing weights.
- The seat’s back support can benefit lifters who have recurring lower back problems, by providing external torso stability.
- The shoulder press machine allows muscular failure to be reached more safely than overhead barbell or dumbbell exercises.
High Incline Dumbbell Press
This is very similar to the machine shoulder press, but dumbbells allow you to take your shoulders through a longer range of motion. Your elbows can start the movement down by the sides of your body, move upward to the mid-point of the press, and moving together as your elbows lockout towards your body’s midline, stacking above your shoulders and underneath your wrists.
Dumbbells also offer the ability to rotate your hand position as you press, which can accommodate any wrist or elbow discomfort. This dumbbell press is an ideal alternative for lifters with joint problems.
How to Do the High Incline Dumbbell Press
Set an adjustable bench one notch below 90-degrees. This high angle allows the benefits of an overhead shoulder press while further reducing joint stress. The top part of the shoulder press is the joint’s most vulnerable position. By taking the bench down one notch from fully upright, you can still take the shoulders through a full range of movement but it’s safer because your upper back and shoulders have more room to move.
Begin with the dumbbells at shoulder-height, palms facing away from you. Press upward with control, bringing your thumbs toward each other as the weights pass above your head. Maintain control of the dumbbells and don’t allow them to bounce together at lockout. Pause briefly before returning to the starting position.
Benefits of the High Incline Dumbbell Press
- The high incline dumbbell press combines the upper-body support benefits of a seated press with the joint-friendly adjustability of dumbbells.
- This press variation works well as a type of “bridge” between shoulder training and chest training, due to the bench angle. A slightly lower angle would begin to emphasize the chest more than the shoulder muscles.
Seated Arnold Press
Success leaves clues and if this exercise was good enough for Arnold, then it’s good enough for you. This comprehensive movement incorporates full range of motion at the shoulders and elbows, plus coordinated movement at shoulder blades. This all combines to engage the serratus anterior, lateral and rear deltoids, trapezius, teres major and minor, plus some lats.
Sounds good to be able to hit all of those muscles in one go, right? Maybe. The problem is that you are spreading the effort, intensity, and force across so many muscles in varying amounts, so it might not be a top choice for building strength. But it’s a good pick when looking to accumulate more training volume to stimulate overall growth.
How to Do the Seated Arnold Press
Set an adjustable bench at an extremely high angle, one notch below fully upright. Elevate your feet to really lock into the seat. Start with the two dumbbells at shoulder-height in front of the body with your palms facing towards you. Start to press them up. Once your hands reach eye-level, start to rotate your arms out to the side as you continue pressing. A common mistake with this exercise is rotating your hands to early, which just makes the exercise a basic seated shoulder press.
Rotate consistently as you press upward. At the top of the press, your hands should be facing forward. If you have limited shoulder mobility, they may end up neutral (facing each other). Reverse the entire motion on the way down back to the starting position.
Benefits of the Seated Arnold Press
- The Arnold press works the shoulders through a longer range of motion than a traditional shoulder press. This can create a greater stimulus for muscle growth.(1)
- This exercise recruits more muscles throughout the shoulders and upper back, which creates greater stability, reduced risk of injury, and an increased growth stimulus.
Single-Arm Standing Dumbbell Press
Unilateral training can be very beneficial because we have something called the bilateral deficit, or BLD. While I do share the same initials, rest assured I did not come up with this concept. The bilateral deficit is essentially the body’s ability to more efficiently recruit individual limbs compared to working both limbs together.(2) For example, if you can shoulder press two 40-pound dumbbells simultaneously, you can likely press one 45 or 50-pound dumbbell for the same number of repetitions.
You can use the bilateral deficit to your advantage with the single-arm standing dumbbell press. This will not only allow you to use a relatively greater load, for increased strength and muscle gains, but the standing position can increase the range of motion and improve shoulder mobility.
How to Do the Single-Arm Standing Dumbbell Press
Stand behind a vertical bench, holding a dumbbell at shoulder-level in one hand with your free hand on top of the bench for support. Push into the bench to create stability as you press the weight to lockout above your head. Lower the weight under control. Perform all reps with one arm before switching sides.
Benefits of the Single-Arm Standing Dumbbell Press
- The single-arm standing dumbbell press allows you to use relatively heavier weights than pressing two dumbbells together, which can lead to greater size and strength.
- The added bench support provides stability and can help to reduce lower back strain.
- This standing position incorporates core strength and total-body stability.
Dumbbell Z Press
This exercise has become relatively popular over the last few years. In part, possibly because it’s named after one of the greatest strongmen of all-time, Žydrūnas Savickas, also known as “Big Z.” While the Z press is often performed with a barbell, using a pair of dumbbells can further increase the core stability challenge.
The Z press requires, and can improve, mobility in your thoracic spine (upper back) and it creates tremendous core engagement because your upper body is entirely unsupported. This means you probably won’t be moving very heavy weights, but the exercise can be great for accumulating plenty of muscle-building volume.
How to Do the Dumbbell Z Press
Sit on the ground with your legs extended straight. If you lack hip mobility or if it’s too uncomfortable, sit on a very low box or step. Make sure you keep your shoulders stacked over your hips and your spine straight.
Bring two dumbbells to shoulder-level with your palms facing forward. Press both weights overhead to lockout, being sure to keep your upper body vertical as you stabilize the weights. Pause very briefly at lockout and lower the dumbbells to your shoulders.
Benefits of the Dumbbell Z Press
- The Z press builds major core strength because you’re forced to support the weight as it moves.
- The exercise reinforced strict pressing technique and eliminates the ability to swing the weights using your lower body. Leaning backward to cheat the movement also becomes much more apparent and easier to correct.
Dumbbell Cuban Press
Legend has it that this exercise was initially used by the Cuban Olympic weightlifting team to strengthen their shoulders. It was also popularized by the legendary late strength coach Charles Poliquin. The Cuban press trains the smaller internal stabilizer muscles of the shoulder and upper back, as well as the aesthetic outer shoulder muscles.
It walks the fine line between being a “prehab” movement focused on preserving and building shoulder health and being a strict muscle-building movement with a long time under tension.
How to Do the Dumbbell Cuban Press
Stand with two light dumbbells at your sides with your palms facing behind you. Lift your elbows up and out to the side with your hands hanging straight down. Once your elbows are in line with your shoulders, rotate your arms to point your hands toward the ceiling, with the weights around eye-level. Keep a roughly 90-degree angle at your elbows.
Finish by fully extending your arms and press to lockout. Reverse the process to lower the weights to the starting position. This exercise is a lot harder than it looks, so you won’t need much load or too many sets and reps. Starting with two sets of eight to 10 reps to learn the movement with very light weights.
Benefits of the Dumbbell Cuban Press
- The dumbbell cuban press strengthens shoulder stabilizers, including the rotator cuff, during the rotation movement prior to pressing.
- The exercise is typically performed slowly with an emphasis on technique, which increases the overall time under tension. This can contribute to greater muscle growth.
Behind-the-Neck Press
This exercise is performed with a barbell and, as the name suggests, the bar travels behind the neck instead of in front. This bar path makes it easier to stay in a stronger, safer position with your upper body stacked and in alignment. However, it does require good upper back mobility and it makes the initial part of the press significantly more challenging for both your shoulders and your triceps.
The biggest complaint (or fear) some lifters have is that the behind-neck position requires a good amount of shoulder mobility in order to successfully go through the full range of motion. If you don’t have the mobility to perform the movement, don’t worry. There are many other exercises you can do, this is just not one of them. But the behind-the-neck press has been a staple for weightlifters and bodybuilders for decades, so it’s not an exercise to steer away from if you can handle it.
How to Do the Behind-the-Neck Press
Set a barbell in a power rack at roughly shoulder-height. Grab the bar with your hands just outside shoulder-width and pull your elbows forward to sit directly below your wrists. Unrack the weight and take a small step backward. Brace your core, and keep your legs and torso stable as you press the weight up. Fully extend your arms at the top.
To lower the weight, focus on pulling your elbows towards the sides of your body to load the shoulders more than the triceps. Keep your elbows beneath your wrists throughout the exercise. Depending on your mobility, the bar might gently touch the base of your neck before you press back up again.
Benefits of the Behind-the-Neck Press
- The behind-the-neck press helps to build functional mobility by training the shoulders, upper back muscles, and shoulder blades through a long range of motion.
- The bar path and body position reinforces strict pressing technique which puts emphasis on muscle recruitment instead of momentum.
Military Press
To many experienced lifters, this exercise is the end-all-be-all shoulder movement. The classic standing barbell press is a hallmark of old school weightlifting, classic bodybuilding, and all-around power and athleticism.
With this more common variation of the shoulder press, the barbell moves in front of the body. This creates two distinct challenges. First, core stability — You need to be more active in pulling your ribs down and tucking your hips under to stay stacked. Second, core control — You are unable to press straight up because the bar begins underneath your chin, so you have to move the barbell in an arching motion around your head while maintaining a strong center.
How to Do the Military Press
Set the barbell in a power rack at roughly shoulder-height. Grab the bar with your hands just outside shoulder-width. Take a small step back with the bar resting across the fronts of your shoulders. Brace your abs and press up, staying as close to your face as possible without hitting your chin, nose, or forehead (obviously).
As you reach the lockout, “punch” your head between your arms. Your biceps should end up in-line with your ears. Maintain control of the bar by attempting to pull the bar apart as you’re pressing the weight above your head. This one small change can make a big difference in how the movement feels on your muscles and joints.
Benefits of the Military Press
- The military press is often considered a gold standard movement, on par with the flat bench press, for assessing and building upper body strength.
- This overhead press allows you to move potentially heavy weights, overloading the shoulders for greater strength and muscle gains.
Push Press
The push press has been wide-spread with the rise in popularity of things like CrossFit and HIIT-style group fitness workouts. In the push press, you are focusing on dip and drive — using your legs and hips to get the weight above your head.
Using your legs allows you to move a load that you wouldn’t otherwise be able to press with strict form for as many reps. At the top of the rep, you can really overload your shoulders and triceps as they control the weight back down with a slow eccentric contraction.
How to Do the Push Press
Hold a barbell in front of your shoulders, with a shoulder-width grip and your hands facing away from your body. Bend your knees slightly and drop your hips as if you were about to initiate a front squat. Quickly and powerfully extend your legs and drive your hips forward to get the weights moving off your body.
When the barbell is in motion, use your arms to guide it above your head to lockout. Think “legs drive, arms guide.” Don’t squat too deep before rising. You’ll only make it harder to get the weights above your head quickly. For maximum power output, be sure to get the weights moving using leg drive, not shoulder pressing strength.
Benefits of the Push Press
- This can be a great exercise for building upper body strength due to the use of heavy weights and total-body coordination.
- The strict eccentric portion of each repetition lets you accumulate significant volume and time under tension, which benefits muscle growth.
Machine Lateral Raise
The machine lateral raise is a great exercise for isolating and emphasizing the lateral, or side, part of the shoulder muscle. The lateral head of the shoulder primarily responsible for abducting the arm, or raising it away from the midline of the body.
Many very successful bodybuilders will prioritize lateral raise variations like this to help create a classic v-taper upper body. The machine lateral raise offers constant resistance compared to a dumbbell, which offers varying levels of resistance due to the changing pull of gravity throughout the range of motion.
How to Do the Machine Lateral Raise
Sit in the machine with your chest supported on the pad, if available. With most machines, you’ll perform this exercise with your elbows bent at roughly 90-degrees and the pads sitting on the outside of your upper arms.
Lift both arms until they’re parallel with the floor. Your elbows and upper arms should be in-line with your shoulders. Lower the pads with control. The bent arm position helps to focus the work on the shoulders and reduces the temptation to use your traps and upper back muscles.
Benefits of the Machine Lateral Raise
- The machine provides a controlled setup which makes it safer to take sets up to, or beyond, muscular failure.
- The machine lateral raise offers constant resistance throughout the entire range of motion, creating a longer time under tension and greater muscle-building stimulus.
Cable Lateral Raise
This version of the lateral raise is normally performed unilaterally (one arm at a time). The cable provides constant tension, so you are forced to work against the resistance throughout the whole range of motion.
The movement is also more strict because it is harder to use momentum to lift the weight due to the cable pulley. The cable setup also allows you to increase muscular stress in the lower portion of the repetition, compared to dumbbell lateral raises which have reduced resistance in the bottom of each rep.
How to Do the Cable Lateral Raise
Attach a single handle to a cable pulley set just below your knee. Stand sideways to the pulley with your non-working arm near the weight stack. Grab the handle with your palm facing the cable pulley. Begin with your arm slightly bent and your hand just below your belly button. Raise the handle sideways until your elbow is in line with your shoulder. Imagine reaching your hand out as far away from your body as you can. This should stop you from lifting your shoulders and engaging your traps.
Hold the top position for one second and initiate the eccentric portion as slowly. Pause briefly in the bottom position before starting the next rep to emphasize the stretched position.
Benefits of the Cable Lateral Raise
- The cable lateral raise provides high-tension with relatively light weights. It can be humbling and much harder than you think, making it a joint-friendly way to train without needing to move heavy weights.
- The unilateral movement allows you to concentrate on the working muscle, which can improve the mind-muscle connection and boost muscle growth.
Chest-Supported Lateral Raise
This version of the classic dumbbell lateral raise puts you in a more supported position with a greater opportunity use strict form and avoid momentum. This shifts more stress onto the side head of the shoulders.
The chest-supported lateral raise is perfect for high volume with slow repetitions. The bench support reduces lower back strain by removing your ability to swing your torso when lifting the weights.
How to Do the Chest-Supported Lateral Raise
Set an adjustable bench slightly below vertical. Straddle the bench with your chest supported on the back pad. Bring your arms slightly in front of you, holding a dumbbell in each hand with your palms facing each other.
Raise your arms up and out to the sides. Focus on feeling tension in your shoulders and not your traps or back. Pause briefly when your hands reach shoulder-height. You can further reduce momentum and increase muscle tension by taking two seconds to raise the weights and two seconds to lower them.
Benefits of the Chest-Supported Lateral Raise
- The stabilized body position significantly reduces lower back strain, making it an ideal option for lifters with back issues.
- The chest-supported lateral raise reinforces strict exercise performance by limiting the ability to swing your body and create momentum.
Machine Rear Delt Flye
The rear deltoid is the forgotten child of the shoulder family. It gets some secondary attention during many pulling movements like pull-ups, rows, and deadlifts, but this relatively small muscle head rarely gets the attention it deserves when it comes to direct shoulder training.
The rear deltoid is not only important for building a well-rounded, well-muscled shoulder. It also plays a key role in overall shoulder joint health. Strong posterior deltoids are associated with rotator cuff health and overall shoulder mobility.(3)
How to Do the Machine Rear Delt Flye
Adjust the seat height until the handles are in-line or slightly higher than your shoulders. If the handles are too low, you’ll get a lot of help from the muscles in the upper back and triceps which are both stronger than the rear deltoids.
Face into the seat, brace against the pad, and grab the handles with a thumbs-up grip. Keep your arms slightly bent as you pull back until your elbows are even with your shoulders. Focus on separating your hands as far away from your body as possible instead of pulling your shoulders together.
Benefits of the Machine Rear Delt Flye
- The machine rear delt flye allows total-body support for focused work on the small target muscle.
- This exercise is ideal for working the rear deltoids with a high volume of work without fatiguing surrounding muscles. Performing the exercise three to four times per week with two to three sets of 10-15 can be an effective way to emphasize the rear delts.
Single-Arm Cable Rear Delt flye
The cable rear delt flye allows you to take the muscle through a very long range of motion, across your entire body, with constant tension. The adjustable pulley makes it easier to set the height of the cable appropriately for your body compared to rear delt machines with fewer seat height options.
When performed correctly and with strict technique, this is an extremely effective high-tension, isolation exercise to zone in on the rear delt with minimal contribution from other body parts.
How to Do the Single-Arm Cable Rear Delt Flye
Set the cable pulley to just above shoulder-height. You can either hold the end of the cable without a handle attachment or, if it’s uncomfortable, grab a single rope handle. Set up perpendicular to the cable and grab the handle palm-down with your outside arm. Begin with your arm straight and your hand in line with your chin.
This is where the muscle will be at its most lengthened under load. Reach your arm away from your body, keeping your hand at chin-height to avoid recruiting muscles in the upper back. Don’t twist your upper body as your arm extends to the side. Pause briefly when your arm is extended directly to your side before returning to the starting position.
Benefits of the Single-Arm Cable Rear Delt Flye
- The cable pulley provides constant tension for improved muscle growth.
- The single-arm cable rear delt flye helps to improve the mind-muscle connection by limiting the muscles that can contribute to the movement.
- The standing position recruits your core stabilizers, particularly your oblique muscles, more than many other shoulder movements.
Pike Push-Up
The full handstand push-up is a very advanced skill, but you can use a variation to successfully improve strength and shoulder mobility, with the latter being a major benefit.
By setting your feet on an elevated platform and “piking” your body into an L-shape, you build overhead pressing strength using only your bodyweight, while improving your leverage and reducing the overall load you need to press.
How to Do the Pike Push-Up
Place your hands on the floor and your knees on a 20 to 24-inch box or bench. Hinge at your hips to bring your upper body close to perpendicular to the ground. Bend your elbows to lower your head down toward the ground.
Keep your core engaged and maintain a stable position as you press up. Keep your hips stacked over your ribcage, and your shoulders over your hands. In the fully locked out position, drive your shoulders toward your ears to engage your serratus anterior (near your chest, ribs, and abs). This will open your upper back and shoulders for more range of motion.
Benefits of the Pike Push-Up
- The pike push-up works well as a thorough upper body warm-up performing, performing several sets of three to five reps before any other pressing exercises.
- The inverted position helps to build core strength while also improving hip and hamstring mobility and stability.
- This is one of the few bodyweight exercises to emphasize the shoulders. The majority of push-up variations emphasize the chest or triceps.
The Shoulder Muscles
Because your shoulder muscles are comprised of three separate heads, each emphasized by different movements and functions, a well-designed shoulder workout recognizes and addresses their differences. This is the most efficient way to build maximum size and strength.
Anterior Deltoid
The anterior deltoid, or front delt, is located in the front section of the shoulder muscle. It, appropriately, is involved in raising the arm from your side, in front of your body, to an overhead position.
Because this is an extremely common movement, the anterior deltoid is stimulated and recruited during many common exercises including many variations of the chest press, all varieties of overhead pressing, and even many biceps curls. Specific isolation exercises targeting the anterior deltoid are not often a focus of shoulder workouts, to avoid overtraining the frequently used muscle.
Lateral Deltoid
The lateral, or side, delt is the most aesthetically important section of the shoulders because it’s responsible for most of the visible width of the muscle. When looking to dramatically change your physique, emphasizing the side deltoid using lateral raise variations is the most efficient approach, but the side delts are also heavily recruited during any overhead press movement.
Posterior Deltoid
The posterior, or rear, deltoid head is sometimes considered part of the “upper back” musculature, but it resides specifically on the shoulder itself. This muscle head attaches along the shoulder blade and is involved in moving the shoulder blades toward and away from your spine. The rear delts also play a major role in pulling your upper arm backward from an extended position.

These two functions are similar to many back muscles, like the rhomboids, trapezius, and teres. While the rear delts contribute to many back exercises, they are often “overpowered” by relatively larger muscles, which is why rear delt flye variations are needed to prioritize the muscle.
How Often Should You Train The Shoulders?
Similar to other muscle groups, training a muscle more frequently seems to be better for strength, hypertrophy, and athletic performance.(4) Most people will do well training shoulders two times per week, as you’ll get a lot of extra work from many other upper body exercises like presses and rows.
If you were going to do a short-term specialization phase, you could train shoulders up to four or five times per week with a well-planned routine that manipulates volume and intensity to allow recovery and growth.
How to Progress Your Shoulder Training
Categorize exercises into movements that focus on strength, volume, or isolation (single-joint). Pick one exercise for each of those categories. Strength exercises are programmed with relatively heavy weights and low reps. Volume movements are more efficiently trained with moderately challenging weights in the eight to 15 rep range. Isolation exercises include flye and raise variations which involve only the shoulder joint, not the elbow (which is involved in pressing exercises).
The most common mistake when it comes to shoulder training is doing too much isolation work — too many flyes and raises with less pressing. This could be a symptom of using a chest, shoulder, and triceps workout in your training split, or having an upper body workout which makes the shoulders a relatively lower priority compared to the back and chest.

However because your shoulders are involved in many movements indirectly, you can generally get away with relatively less direct volume as long as you achieve sufficient volume each week. Try to approach shoulder training with two main phases: Intensity and accumulation.
In an “intensity” phase, focus more on building strength and power. Pick either a strength movement, a volume movement, and an isolation movement or a strength and two isolation movements, and focus your shoulder training on this limited selection of movements.
In an “accumulation” phase, the focus is on performing more total volume so, appropriately, pick a volume exercise plus two isolation movements or three isolation exercises. Workouts will involve racking up the reps and piling on the muscle-building tension.
Alternating between those two phases, spending several weeks in each, can help you keep as much strength as possible during the accumulation phase while maintain work capacity and conditioning during the intensity phase, as muscle growth rolls in throughout both.
How to Warm-Up Your Shoulders
The design of the shoulder joint makes it versatile and crucial to a number of movements, but it can also be prone to injury if trained improperly. A simple and effective shoulder warm-up can mean the difference between results and nagging injuries, so take the time to get blood flowing before any session. Grab a resistance band and try this simple circuit.
- Scapular Pull-Up: Hang from a pull-up bar with a shoulder-width, overhand grip. Keep your arms straight as you “reverse shrug” and drive your shoulders and shoulder blades toward the ground. Hold the top position briefly before reversing the motion to push your body away from the bar. Perform 10 repetitions before moving to the next exercise.
- Yoga Push-Up: Get on the ground with your feet well-beyond shoulder-width and your hands in-line with your shoulders. Descend into a standard push-up. When your chest is slightly above the floor, press up while pushing your hips back at an upward angle. You should feel a stretch in your hamstrings as your torso and legs form an upside down “V” shape. Reverse the motion and perform for three to five reps.
- Band Pull-Apart: Take a palms-down grip on a resistance band. Begin with your arms extended in front of your chest. Keep your arms nearly locked while pulling your hands in line with your shoulders. The band should touch your chest before returning to the starting position. Perform 10 to 15 repetitions before repeating the first exercise. Perform a total of three circuits.
The Path to Bolder, Boulder Shoulders
“Shoulder press and lateral raise” is often the default shoulder workout for beginners. While those are two fundamental exercises, complete shoulder development requires a better thought-out approach to training. By choosing specific exercises to emphasize power, strength, or particular muscle heads, you can take your shoulder development and strength to the next-level. Rethink your approach to shoulder training, incorporate the right movements, and you’ll be on the way to a stronger, wider set of delts.
References
- Baroni, B. M., Pompermayer, M. G., Cini, A., Peruzzolo, A. S., Radaelli, R., Brusco, C. M., & Pinto, R. S. (2017). Full Range of Motion Induces Greater Muscle Damage Than Partial Range of Motion in Elbow Flexion Exercise With Free Weights. Journal of strength and conditioning research, 31(8), 2223–2230. https://doi.org/10.1519/JSC.0000000000001562
- Nazário-de-Rezende, Fernando et al. Déficit bilateral em exercício multiarticular para membros superiores. Revista Brasileira de Medicina do Esporte [online]. 2012, v. 18, n. 6 [Accessed 26 October 2022] , pp. 385-389. Available from:
- Dyrna, F., Kumar, N. S., Obopilwe, E., Scheiderer, B., Comer, B., Nowak, M., Romeo, A. A., Mazzocca, A. D., & Beitzel, K. (2018). Relationship Between Deltoid and Rotator Cuff Muscles During Dynamic Shoulder Abduction: A Biomechanical Study of Rotator Cuff Tear Progression. The American journal of sports medicine, 46(8), 1919–1926. https://doi.org/10.1177/0363546518768276
- Schoenfeld, B. J., Ogborn, D., & Krieger, J. W. (2016). Effects of Resistance Training Frequency on Measures of Muscle Hypertrophy: A Systematic Review and Meta-Analysis. Sports medicine (Auckland, N.Z.), 46(11), 1689–1697. https://doi.org/10.1007/s40279-016-0543-8
Featured Image: Halfpoint / Shutterstock