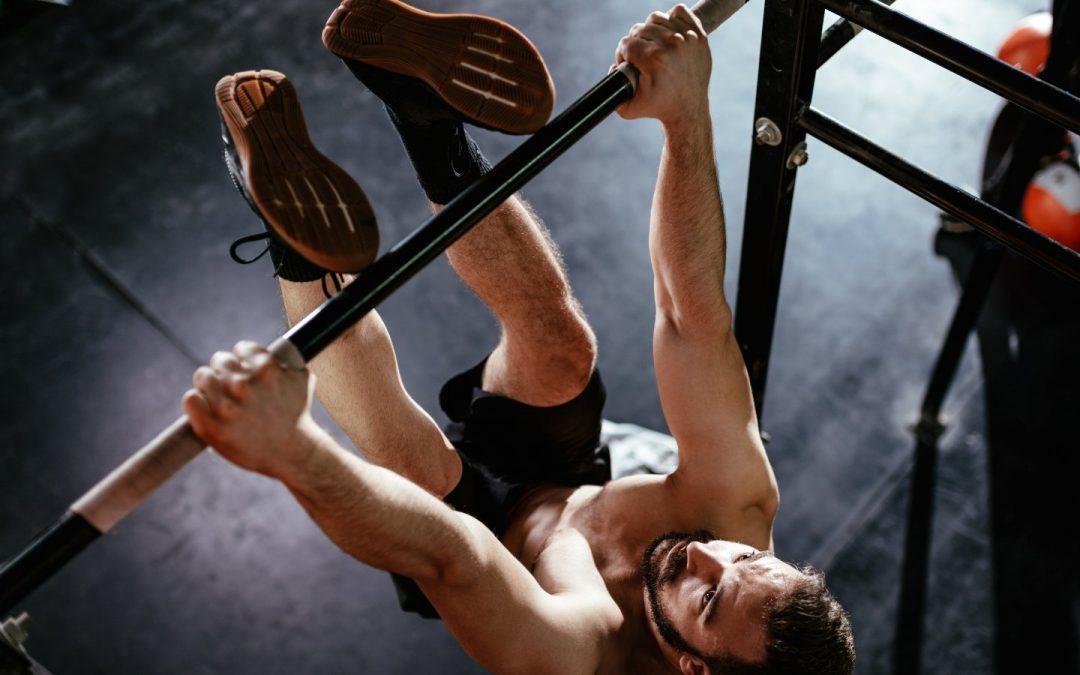
Ask several people to describe the toe-to-bar movement and you’re likely to hear multiple descriptions of how the outcome should be accomplished. That is, actually getting one’s toes “to the bar.” You might think the exercise was relatively simple enough considering its self-evident name, but that’s like thinking there’s only one way to “squat.”
While the movement has gymnastics roots, the toes-to-bar is closely associated with CrossFit athletes and the exercise features frequently in WODs (workouts of the day). Despite the movement’s erratic appearance, the toes-to-bar has potential benefits for athletes of any sport, as well as physique-focused bodybuilders. This article describes technique and programming considerations for the toes-to-bar.
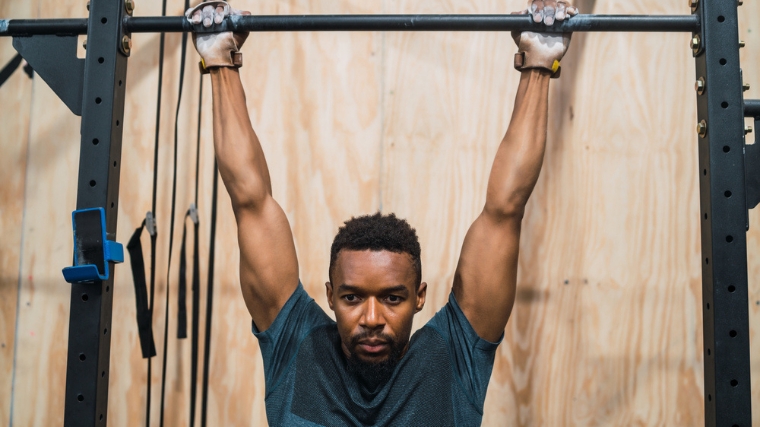
Toes-to-Bar
How to Do the-Toes to-Bar Step By Step
A common version of toes-to-bar involves well-coordinated movement of body segments to achieve fast and efficient performance —kipping. A variation involves action of your abdominals and hip flexors with immaculate body control — strict. The kipping version is described below.
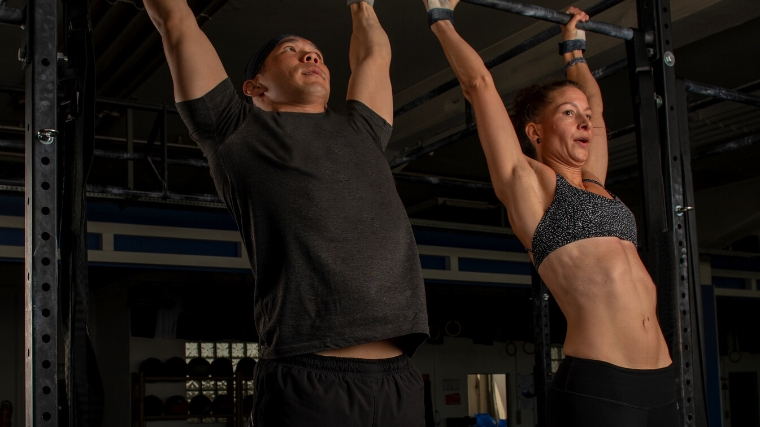
Step 1 — Grab the Bar
Choose an appropriate pull-up bar that’s strong, secure, and taller than your standing overhead-reach height. Take an overhand grip at, or slightly outside, shoulder-width and hang with straight arms.
Form Tip: Consider using a “reverse hook grip” — After wrapping your fingers around the bar, squeeze your thumb over the nailbed of your index finger (and middle finger, too, if you’re able).
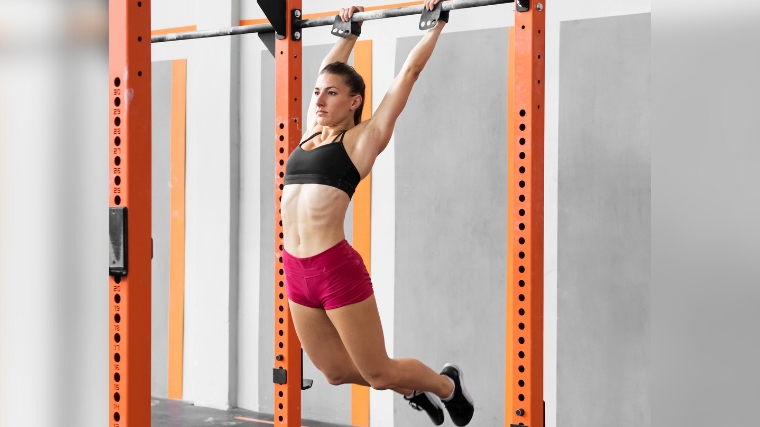
Step 2 — Generate a Kip
“Kipping” refers to the controlled act of swinging to generate momentum. For the toes-to-bar, initiate the kip by arching your back as you extend your legs behind you. Your body should form an extended or “arched” shape under the bar. Immediately reverse the movement by rounding your spine and pulling your legs forward to achieve a flexed or “hollow” shape under the bar. Without losing speed, transition again to the initial extended shape.
Form Tip: When kipping, it’s helpful to think about pushing and pulling the bar horizontally even though the bar itself won’t move. First push backward, then pull forward, and then push backward again. This will help to incorporate your upper body, improve stability and positioning, and can help establish a rhythmic movement.
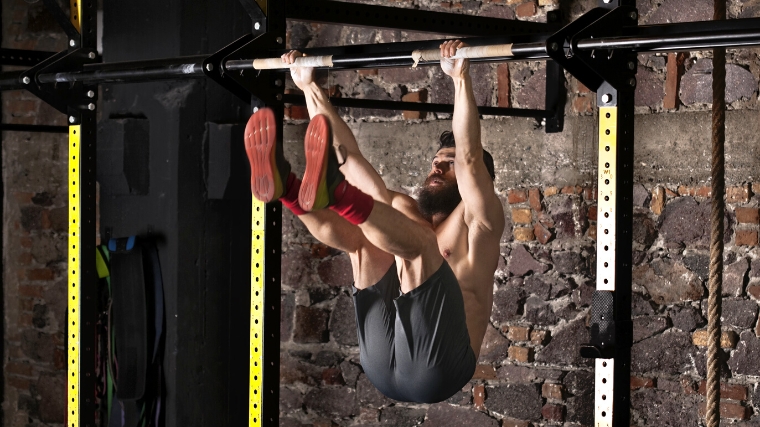
Step 3 — Carry the Kip into Upward Leg Movement

From the arched position, carry your trunk and leg momentum forward once again, but this time actively flex your low back and hips at the end of the kip to transition the momentum upward to the ceiling, not forward.
Form Tip: Keep your gaze straight as you lift your feet. Following your toes with your eyes will only promote neck and spine extension, which will interfere with this phase of the movement.
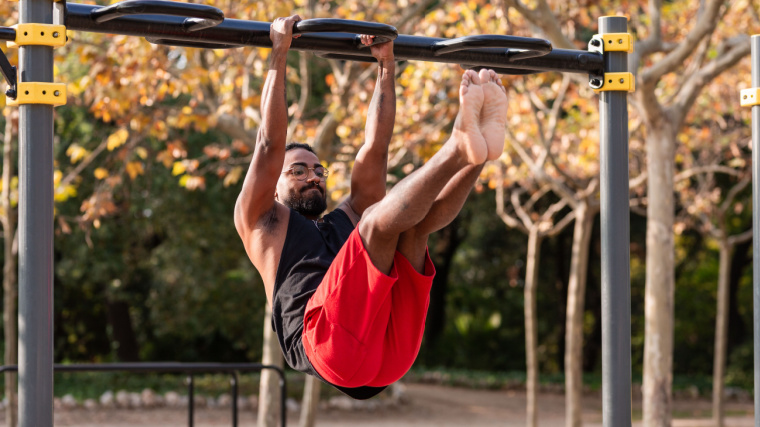
Step 4 — Touch Your Toes to the Bar
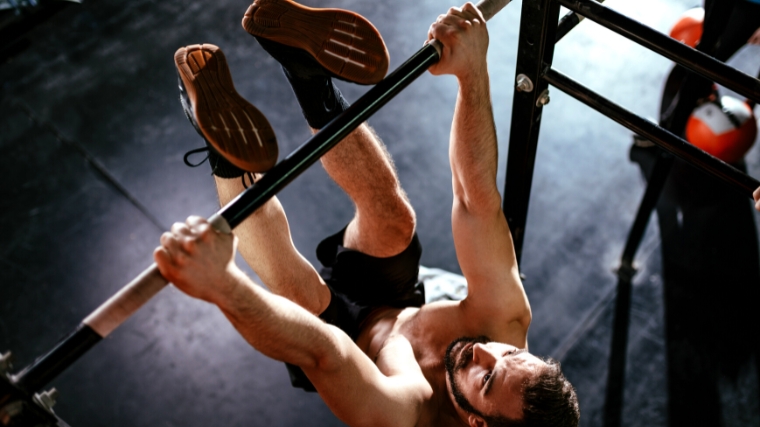
As your low back and hips reach maximum flexion (i.e. maximum compression between your stomach and thighs), straighten your knees and touch your toes to the bar. Use control — you don’t want to kick the bar.
Form Tip: Quickly “flicking” your knees into extension at the top of the repetition rather than keeping your knees straight throughout the movement will promote movement efficiency and speed.
Step 5 — Return to the Extended Arch Position
To smoothly transition into the next rep, allow a slight re-bend to your knees and drive your hips into extension downward. As your legs move below your waist, begin to extend your spine. Once you achieve the arched position, immediately transition to the hollow position to initiate the next repetition.
Form Tip: Unlike the first repetition, subsequent reps should not require multiple forward and back kipping movements to generate momentum. Transition immediately from the hollow position into the upward leg movement of the next repetition.
Toes to Bar Mistakes to Avoid
Common toes-to-bar errors occur when form gets sloppy, when range of motion gets cut short, or when the distinction blurs between the kipping version and the strict version.
Swinging Too Far Forward
An athlete who allows their hips to travel underneath the bar during the “hollow” position (immediately before and during the leg lift) is unlikely to achieve a full repetition. Even if the repetition is salvaged, excessive swinging will disrupt the rhythm of the kip and interfere with the next repetition.
Avoid it: When transitioning from the “arch” position to the “hollow” position of the kip, avoid excessive forward motion of the pelvis by actively pushing yourself backwards. Keeping tension in your upper body and trying to move the bar can help.
Missing Full Compression at the Top
Achieving the end goal of touching your toes, well, to the bar requires full hip and low back flexion. Athletes who fail to achieve this fully compressed position may simply require technique remediation or supplemental mobility work.
Avoid it: During upward leg movement, focus on powerfully pulling your knees toward your elbows. If this intent isn’t enough, it is acceptable to maintain a small amount of flexion throughout the upward movement phase. Then, at the last possible moment, complete the movement by reaching your feet to the bar. Athletes who lack the mobility to achieve the fully compressed position, may benefit from the hanging L-sit variation discussed below.
Slowing the Descent
In contrast to the strict version (and most exercises in the gym), the downward movement phase of the kipping toes-to-bar is not intended to be slow and controlled. Coming down slowly kills your momentum and extinguishes the stretch reflex — Both of these features are needed to perform efficient reps in consecutive fashion.

Avoid it: Instead of attempting to control the descent with your hip flexors and abdominals, actively drive into extension during the descent — first from your hips, then from your spine.
How to Progress the Toes to Bar
Unlike traditional resistance training exercises, the toes-to-bar is not typically progressed via the addition of weight unless, of course, this occurs inadvertently after a big pre-workout meal. Rather, the toes-to-bar is appropriately progressed by increasing repetition rate, manipulating body position, and extending set durations.
Perform More Repetitions Within a Given Time
In fitness competition, the rate of repetition completion is the most important factor, often aiming to complete as many repetitions as quickly as possible. Therefore, pushing yourself to complete more toes-to-bar reps in a set timeframe is a great way to progress this movement. Set a timer for 20 to 40 seconds and hammer out as many good repetitions as possible. Next session, shoot for one or two more reps in the same time.
Lengthen Your Legs
Keeping a slight bend in the knees during the kipping toes-to-bar is acceptable and potentially beneficial because it increases repetition speed. For those less interested in competition and more interested in training abdominals and hip flexors, keeping your knees straight throughout the toes-to-bar is an appropriate progression.
Straight legs place your center of mass further from the working muscles (your abdominals), thereby increasing mechanical demand. To progress in this fashion, simply keep your knees as straight as possible throughout the forward/upward movement phase of the exercise.
Perform More Repetitions “Unbroken”
In CrossFit vernacular, “unbroken” refers to stringing multiple repetitions together without interruption. If fatigue or loss of coordination forces you to release the bar between reps, miss a rep, or perform an extra kip, your set of toes-to-bar is no longer unbroken. Performing unbroken sets builds muscular endurance and taxes coordination.
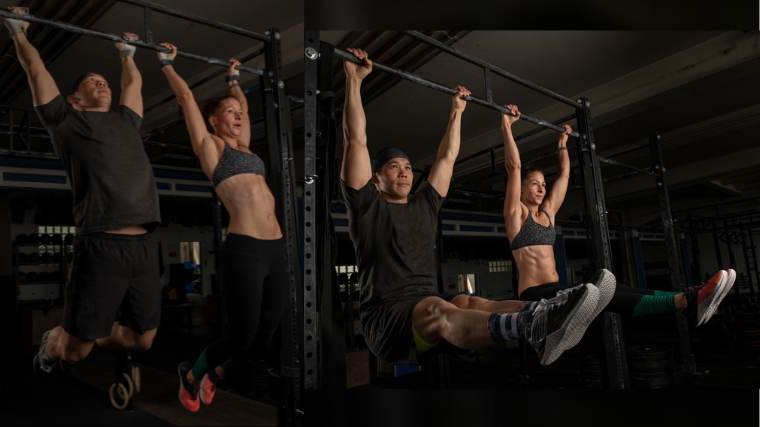
Kipping Toes To Bar
To progress, simply establish the number of repetitions you can perform unbroken, then shoot for an extra repetition or two next time.
Benefits of the Toes to Bar
In stark contrast to the complex movement and coordination demands of the toes-to-bar, the exercise requires one simple piece of equipment — a sturdy pull-up bar. Therefore, the following benefits can be reaped at any gym or local park.
Full Range of Motion Training
The hips and trunk cycle through extremes of flexion and extension during the toes-to-bar. At these extreme positions, core and hip muscles are trained at long muscle lengths. Consistent training at long muscle lengths may reduce risk of muscle and tendon injury. For example, Nordic Curls, which train the hamstrings at long lengths are associated with reduced injury risk. (1)
While more dynamic exercises like toes-to-bar have not yet been studied for the purpose of injury prevention, it is plausible they confer a protective effect, making the abdominals and hip flexors more resilient to strains.
Builds Ballistic Core Power
Abdominal- and hip flexor muscles experience rapid stretch immediately followed by contraction during the toes-to-bar. This sequence engages a phenomenon called the “stretch-shortening cycle” to produce a powerful and efficient muscle contraction. Nearly all sports and athletic endeavors rely on stretch shortening cycle muscle actions. And with training, stretch shortening cycle contractions can be enhanced.
So, whether you want to spike an unreturnable volleyball, launch a downfield soccer throw-in, or accelerate past your competition on the cross-country ski trails, training the stretch shortening cycle through the toes-to-bar is likely to help.
Movement Coordination Training
The kipping toes-to-bar demands sequenced and controlled movement of the trunk, hips, and shoulder girdle. Timing is everything, as momentum must be carried from one body segment to the next. Dialing-in this coordination sets the foundation for other skills requiring similar movements. Gymnasts use toes-to-bar to teach a clean kipping technique for mounting above the bar. You might use the toes-to-bar to build up to similar movements, such as kipping muscle-ups, kipping pull-ups, or maybe even “the worm” (if you’re into breakdancing).
Muscles Worked by Toes to Bar
The toes-to-bar trains muscles of the anterior chain — the muscles on the front of the body. Muscles of the posterior chain, such as the spinal erectors, multifidi, and hip extensors, help to drive the body into the backswing of the kip, but the anterior core predominates.
Abdominals and Hip Flexors
The tasks of transitioning from the arched position to the hollow position of the kip and driving the toes legs vertical to reach to the bar are accomplished by the abdominals and hip flexors. Key muscles include rectus abdominis, external obliques, internal obliques, iliacus, psoas major, and rectus femoris.
Grip and Shoulders
A strong grip and robust shoulders are non-negotiable attributes for the toes-to-bar. Finger flexors and thumb muscles must not only support the weight of the body, but contend with multidirectional forces produced during kipping.
While stabilizing muscles preserve the integrity of the shoulder, shoulder flexors and extensors rhythmically contract to facilitate kipping. Most notable are latissimus dorsi, regions of pectoralis major, and posterior deltoid, which help to create the hollow position and keep the trunk behind the bar during the leg lift.
How to Program the Toes to Bar
The toes-to-bar is likely to pop up in prescribed CrossFit workouts during competitions and training. They can be programmed for day-to-day workouts in a variety of ways to suit your needs.
Part of a Complex
A complex is two or more exercises performed continuously with the same equipment. Complexes are an efficient and engaging way to build work capacity and develop movement skills. The toes-to-bar pairs well with kipping muscle-ups and kipping pull-ups, as the momentum from the kipping motion can be preserved throughout the entire complex. For a challenge, try six repetitions of toes-to-bar, followed by three reps of muscle-ups, then six kipping pull-ups.
Progressive Skill Training
Dedicated practice is needed to achieve technical mastery of the toes-to-bar. Motor learning is likely most effective when unfatigued. (2) For best results, dedicate an early portion of your workout to the toes-to-bar. Try three to five sets of six to 12 reps, three or more days per week.
If you are a CrossFit competitor, you will likely need to perform toes-to-bar in a fatigued state. So be sure to challenge yourself from time to time with longer sets, short rest intervals between sets, or circuit training that includes the toes-to-bar.
Part of a Multi-Mode Workout
In the sport of fitness (i.e. CrossFit), multiple exercises are programmed in the same workout, often in circuit training fashion. Commonly, these exercises are performed as “rounds for time” (RFT). In an RFT workout, a round consists of a defined number of repetitions for several exercises. The athlete performs a designated number of rounds as fast as possible. For example, eight rounds of 16 kettlebell swings, eight toes-to-bar, and four wall ball shots. Track the time it takes to complete the entire series and aim to beat that time next workout.

Another common workout design is EMOM or every minute on the minute. The exercises are performed for a prescribed number of repetitions every minute for a designated number of minutes. The repetitions should be completed in under one minute, and any time remaining is dedicated to rest. For quick workout, try a 10-minute EMOM of eight toes-to-bar, six push-ups, and four dumbbell front squats.
Toes-to-Bar Variations
Novice athletes or athletes with goals outside of CrossFit, gymnastics, and parkour may be better served by one of the following variations.
Strict Toes-to-Bar (Hanging Leg Raises)
Those with fitness goals not directly related to gymnastics or fitness competition may consider the strict toes-to-bar variation, commonly called “hanging leg raises.”
Strict Toes To Bar
By eliminating the momentum and stretch reflex generated by a kip, the strict variation forces your abdominals and hip flexors to act in a slower and more isolated fashion. This results in higher levels of muscle activity in the rectus abdominis and obliques. (3)
Hanging L-Sit
Hanging L-sits are an isometric, or motionless, endurance exercise. The “L-sit” places the mass of the legs at its furthest point from the hips and low back, which trains your abdominals and hip flexors. This exercise may help to address weak points in the toes-to-bar.
L Sit on Bar
If you’re not accustomed to training your hip flexors at short muscle lengths, don’t be surprised if they cramp during your first few sessions. Shake it out and get back to work.
Controlled GHD Sit-Ups
To progress toward the kipping toes-to-bar, novice athletes should consider the controlled glute-hamstring developer (GHD) sit-up. Unlike standard sit-ups on the floor or a sit-up board, this exercise trains your hip flexors and abdominals at long muscle lengths.
Controlled GHD Sit-up
This exercise can also be used as a progression toward CrossFit-style GHD sit-ups, which are performed more rapidly and with outstretched arms.
Lying Leg Lifts
Athletes unable to hang from a pull-up bar due to weakness or equipment unavailability might consider training their abdominals and hip flexors using lying leg lifts. This exercise only requires a bench or open floor space and a sturdy object to hold on to as a counterbalance to the lower body — a heavy kettlebell or dumbbell also works.
Flat Bench Lying Leg Raise
Be sure to keep your low back pressed into the bench or floor throughout each repetition to avoid a loss of tension at the bottom of the repetition.
FAQs
Does the toes-to-bar work the ‘lower abs’?
The toes-to-bar is a great abdominal exercise for those physically prepared to contend with its demands. And, yes, it might bias the lower portions of these muscles.
The toes-to-bar involves resisted and powerful trunk flexion, which undoubtedly works the abdominals. Rectus abdominis (the “six-pack abs” muscle) runs vertically from the underside of the sternum and ribcage to the pubic bone. The fibers of rectus abdominis also run vertically but do not run the entire length of rectus abdominis, because they are interrupted by tendinous inscriptions that create the outline of a chiseled six- (or eight-) pack.
Due to the momentum of the kip and the stretched position of the muscle, rectus abdominis likely experiences peak tension during the rapid eccentric contraction at the bottom of the movement. Eccentric muscle contractions have been shown to elicit preferentially greater muscle growth at the distal end of the muscle in other body parts. (4) Therefore, the eccentric bias of the toes-to-bar could, theoretically, lead to enhanced lower abdominal development over time.
A rationale based on surface electromyography (sEMG) is most commonly cited to support the toes-to-bar (and similar exercises) for “lower abs” training. Leg raises result in greater activity in the lower portion of rectus abdominis than the upper portions. (5) Similar findings have been reported with hanging knee-ups, which are essentially hanging leg raises performed with bent legs. (6) Due to the similarities between these exercises and the toes-to-bar, it is fairly safe to assume that the toes-to-bar, too, electromyographically biases the lower rectus abdominis.
However, surface electromyography is not a valid indicator of the amount of muscle a dynamic exercise activates or will ultimately stimulate to grow. (7)(8) For these reasons, we must be cautious about inferring superior “lower ab” hypertrophy outcomes from toes-to-bar.
Keep in mind, toes-to-bar is a very fast movement. Although peak tension in the muscle is likely quite high during the eccentric transition of the kip, the abdominals do not experience prolonged time under tension. Those interested in building muscle may be better served by a more traditional exercise variation, such as the strict toes-to-bar or reverse crunch.
My grip fails first during a set of the toes-to-bar. Recommendations?
Hanging ab straps can be used during the strict toes-to-bar to reduce demand on the shoulders and grip. Gymnastics grips or chalk may assist with grip issues. Aside from these modifications, it might be prudent to focus on building your forearms and lats to work up to the toes-to-bar. Pull-ups and lat pulldowns are great options.
The toes-to-bar is just too hard. How can I work up to it?
Consider a progressive strategy to build the requisite strength and control for toes-to-bar repetitions. Here is a sample exercise progression using Variations discussed above: Start by training your hip flexors and abdominals at short muscle lengths using hanging L-sits. Add long muscle length work via controlled GHD sit-ups.
Strict toes-to-bar, although difficult, may be possible before kipping toes-to-bar, because they are less complex. Practice the forward and back (arch to hollow) kipping motion, in isolation without the leg raise, on a pull-up bar. Once proficient, it’s time for the real-deal toes-to-bar.
Appropriated by CrossFit, but Not Limited to “Fitness Competitions”
The toes-to-bar is a relatively complex exercise used in some CrossFit competitions and workouts. It can also be used to develop gymnastics skills, be placed in calisthenics programs, or it can be added added to a standard gym workout as a novel core exercise.
Like any complex exercise, mastery of the toes-to-bar takes practice and patience. But once you dial in, you’ll be stringing together unbroken repetitions with ease with core strength, and core development, to show for it.
References
- Al Attar, W. S. A., et al. (2017). Effect of injury prevention programs that include the Nordic hamstring exercise on hamstring injury rates in soccer players: a systematic review and meta-analysis. Sports Medicine, 47, 907-916.
- Branscheidt, M., et al. (2019). Fatigue induces long-lasting detrimental changes in motor-skill learning. Elife, 8, e40578.
- McGill, S., Andersen, J., & Cannon, J. (2015). Muscle activity and spine load during anterior chain whole body linkage exercises: the body saw, hanging leg raise and walkout from a push-up. Journal of Sports Sciences, 33(4), 419-426.
- Franchi, M. V., Reeves, N. D., & Narici, M. V. (2017). Skeletal muscle remodeling in response to eccentric vs. concentric loading: morphological, molecular, and metabolic adaptations. Frontiers in Physiology, 8, 447.
- Pruthviraj, R., & Paul Daniel, V. K. (2017). Electromyographic analysis of exercises proposed for differential activation of rectus abdominis muscle components. Int J Phys Educ Sports Health, 4, 153-157.
- Escamilla, R.F, et al. (2006). Electromyographic Analysis of Traditional and Nontraditional Abdominal Exercises: Implications for Rehabilitation and Training. Physical Therapy, 86(5), 656–671.
- Vigotsky, A. D., et al. (2018). Interpreting signal amplitudes in surface electromyography studies in sport and rehabilitation sciences. Frontiers in Physiology, 985.
- Vigotsky, A. D., et al. (2017). Greater electromyographic responses do not imply greater motor unit recruitment and ‘hypertrophic potential’ cannot be inferred. The Journal of Strength & Conditioning Research, 31(1), e1-e4.
Featured Image: MilanMarkovic78 / Shutterstock